This time I have a pair of cards using two different techniques to achieve a similar effect.
This one is the more simple of the two. I used some retired Fancy Foil Vellum from last year's Holiday Mini. Yes, I was hoarding it. I am trying to overcome that tendency since it always looks better on a project than taking up space in my crafting area :)
- Cut a piece of Smoky Slate card stock to 4"x5¼". Cut a piece of the Fancy Foil Vellum to 3¾"x5". Apply a dab of adhesive behind where the banner will go and tack to the Smoky Slate, then stitch down with sewing machine.
- Die cut the "jolly" from Christmas Greetings thinlits set out of Silver Glimmer paper. Die cut the double banner from Bunch of Banners framelits.
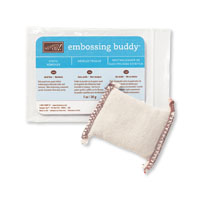
- Use the Embossing Buddy on the double banner. Lay the "jolly" over the double banner to find placement for the "Holly" and "Christmas" stamps, then stamp in Versamark. Heat emboss with Silver embossing powder.
- Use Fine-tip Glue Pen to adhere the "jolly" to the double banner. Apply dimensionals to the back of the double banner and remove the backing from the dimensionals.
- Create a nest of Silver thread by wrapping the thread around 3-4 of your fingers several times, then place over the exposed dimensionals on the back of the banner element. Adhere this to the stitched vellum panel.
- Adhere the completed panel to a Thick Whisper White card base.
- For the inside of the card, I inked up the big snowflake from Holly Jolly Greetings with Smoky Slate ink, then stamped it a few times without reinking between impressions, then added some of the speckles image. All done!
This one required more effort, but actually met the requirements of the July 2016 Creative Crew Challenge I made it for! I have not ordered the Fabulous Foil Designer Acetate yet, so I had to improvise. Now if I had the Fabulous Foil Designer Acetate, this would have been a very fast and easy card, just like the vellum one :) For this one, I did all the same steps, but first I had to get the silver foil look on my Acetate! So, I took dies from the Flourish and Delicate Ornaments framelit sets and die cut a bunch of "snowflakes" out of Silver Foil card stock. Then I used the Fine-Tip Glue Pen to adhere them to a 4"x5¼" piece of Window Sheet.
And I learned that alcohol wipes will neatly remove any extra Fine-Tip Glue Pen adhesive from the acetate, yeah!! And that the Fine-Tip Glue pen does an excellent job of adhering stuff to acetate :)
So which of these do you like better? And do you have the Fabulous Foil Designer Acetate? If so, then you may have just found one more way to use it :)
If you have seen something you need for your crafting life, just click the image in the supply list below and it will take you to my store! If you order less than $150, please use this month's Host Code, which can be found at the top of the sidebar on the right.
And be sure to check the box allowing me to contact you when you check out. I can't send you a thank you card if I don't know your address! And I promise to only send you happy mail, no junk mail :)
Product List


No comments:
Post a Comment
Thank you so much for taking the time to comment. It makes my day to hear from my readers!