I am still fine-tuning my video making abilities, and I hope that they are getting better! At least they are getting shorter :) Please leave me some feedback, click like, and subscribe to see more papercrafting videos from me!
I am in love with pineapples right now. I am not kidding when I say that, between my hubby and I, we go through three fresh pineapples a week right now! I have gotten really good at waiting until they are so ripe, they actually have a coconut flavored undertone. YUM!!! I am going to go have a few bites of pineapple right now while I type this up :)
You will see in the video that I have cut my image into two parts so I can ink them separately.
- There is a watercolor wash as the background of this card front, done in Peekaboo Peach.
- Then the pineapple is inked up with Crushed Curry and thumped with a Soft Suede marker, stamped off once, spritzed with water, then stamped onto the watercolor panel. Then the same process is repeated for the top of the pineapple in Wild Wasabi and accented with Emerald Envy. Do the same on the right side of a 4"x5¼" panel of Whisper White as the card liner.
- Apply Clear Wink of Stella all over the pineapple.
- Stamp the thank you banner from Pop of Paradise in Archival Black ink on a scrap of Whisper White, then die cut with the Paradise Pop die from Dies by Dave
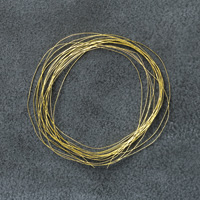
- Apply dimensionals to the back of the banner, create a nest of gold thread, and stick to the back of the banner. Adhere to the cardfront over the middle of the pineapple.
- Stitch around the edge of the watercolor panel.
- Trim 4" square coasters to fit the back of the panel, adhere to card front. Adhere card liner to the inside. All done!
I used a fun die set from Dies by Dave to cut out this banner, and there are so many great dies in this set, you are really going to want them yourself :)
Even on Whisper White the stamping off looks great! This technique gives the image more dimension.
If you have seen something you need for your crafting life, just click the image in the supply list below and it will take you to my store! If you order less than $150, please use this month's Host Code, which can be found at the top of the sidebar on the right.
And be sure to check the box allowing me to contact you when you check out. I can't send you a thank you card if I don't know your address! And I promise to only send you happy mail, no junk mail :)
Product List


Oh my gosh, Tanya! I love this so much! This stamp wasn't even on my radar, but you've made me stop and take a second look at it! Wonderful card!
ReplyDelete