Showing posts with label Halloween. Show all posts

Sunday, October 19, 2014

Stamp Review Crew: Serene Silhouettes Edition

http://stampreviewcrew.blogspot.com/2014/10/stamp-review-crew-serene-silhouettes.html
Here we again with another edition of the Stamp Review Crew. We are featuring Serene Silhouettes this time, and I am so excited! This set is by no means a new set, it has been around for at least 2-3 years, but it is a wonderfully easy set to work with. You can change the mood easily just with color choices, and get all kinds of projects from it, everything from Halloween and Sympathy, to birthdays and Spring, and Christmas! There are masculine and feminine features too :)

I hope you are enjoying all of the creations we are sharing. We sure enjoy pulling out some of our favorite sets to share with you :) If you have missed any of the past hops, be sure to go to the official Stamp Review Crew site and catch up!
You may have just arrived from Nancy Smith's blog, love her stuff! Or maybe you are jumping around. If you are on this hop and get lost at any time, you can get reoriented here.

For my first project, I made an over the hill card. I thought about making it a Halloween card but I don't really send many of those out :) I do have a co-worker who is turning 30 next weekend and she keeps going on about how she is feeling old now, lol! We all keep telling her she is still just a puppy :) She has a great sense of humor and would get a kick out of this card, so she is who is getting this card.
I took a 3"x5" piece of watercolor paper and sponged it with Cajun Craze and Basic Gray ink, then sprayed with Vanilla Shimmer Smooch Spritz. Then I die cut it with the large label from Apothecary Accents framelits, then paper pierced and outlined with the white gel pen.
The banner is a 1" wide strip of Cajun Craze that I embossed with Black embossing powder and this great sentiment from the photopolymer set Bombs Away.

Built for Free Using: My Stampin Blog


This one is with the same image, but with a completely different feel. A lovely soft Christmas card. First I embossed the birds and tree branches image in White embossing powder on watercolor paper, then I used an Aquapainter to add the Soft Sky background. Then Ovals framelits were used to cut out the focal point. The background panel is a Very Vanilla piece with Hardwood BG stamp stamped off once then on the Very Vanilla panel in Soft Sky ink.
I originally intended to emboss the sentiment with Gold embossing powder, but I apparently didn't swipe well enough with the Embossing Buddy because I had a finger shaped blob right next the sentiment that I couldn't stop getting embossing powder on. SO, I used some Gold Perfect Pearls instead.


Inside, I used Versamark again with Gold Perfect Pearls on the rest of the sentiment, so it matches the front.

Built for Free Using: My Stampin Blog


I hope you enjoyed my projects! Now it is time to continue on to Kerry's blog where she is using the digital version of this set to amaze us :)


 http://www.peoniesandpaperchains.com/2014/10/stamp-review-crew-serene-silhouettes-edition.html

http://stampreviewcrew.blogspot.com/2014/10/stamp-review-crew-serene-silhouettes.html


Saturday, September 13, 2014

Ghostly Smiles


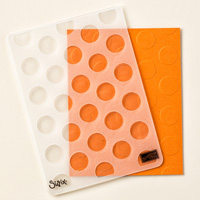
It is long past time for me to try to get back on track doing more stuff on my blog. Honestly, this has been a very busy summer for me. I have spent most of my stamping time organizing the Stamp Review Crew, and over the last 2 months, I have been purging my old stamp sets. With that came reorganizing the ones that are retired but I still want to keep. This has made me want to play with some of my old favorites. I have seen so many cute cards with the jack-o-lantern faces from Freaky Friends stamped on the Large Polka Dot embossed paper, I had to try it myself. I wanted this to be a card I could send anytime this fall, not just for Halloween.I don't have Freaky Friends, so I pulled out these 2 sets and this card just flew together! These sets are retired as physical stamps, but both are still available as MDS downloads. How awesome is that?! I can't wait to send this to someone special :)


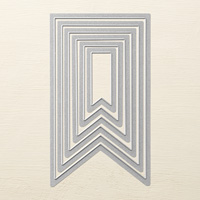
This is a 4x4 card with a 3¾"x3¾" panel that is embossed with with the Large Polka Dots embossing folder, then stamped with the faces from Pumpkin Patch. Then I took a scrap of the Naturals White and stamped the sentiment from Happy Watercolor in Momento Black ink and the dots from Happy Watercolor in Smoky Slate, stamping more than once before re-inking. I die cut the small banner, and then the next size up in Basic Black. The Black banner just cried to be embossed too, so I had to do it :) The banners are glued together and popped up on dimensionals. I taped the ends of the Silver Bakers Twine to the back of the faces panel, then popped the whole thing up on dimensionals.


Inside, I stamped a black face, a full strength Smoky Slate, and a stamped off Smoky Slate. Now, I need to decide who needs a little pick-me-up!

 Ok, I must be off to bed! I have a bunch of family coming from out of town to celebrate my oldest son's birthday. David turned 25 years old on Tuesday, and my in-laws are coming from 2 hours south, and all of my boys and their ladies, and my grandson are coming! I already made pumpkin bread, and tomorrow I must make cheesy garlic bread from scratch, a greens salad, and some chocolate chip cookies to go with the lasagna and better-than-sex cake my mother-in-law is bringing :) I'm getting hungry already, lol!

Thursday, October 31, 2013

Bite Me!

Ok, I don't really want you to bite me :) But you have to admit, it gets your attention! I discovered a new technique this weekend that I just love. It was defined and demonstrated by Janine Tinklenberg (aka the great JanTink) that she calls the Dirty Joseph's Coat technique. Check out that link, she has lovely video tutorial there :)

I started out using the Dynamic Duo challenge, but read the rules again before posting and realized that the challenge is to use those 2 colors with only neutrals.... oh well! I love the pop of green in this, so no way would I change it  :)
  • Stamps: Bite Me photopolymer, Tags 4 You
  • Paper: White, Wisteria Wonder, Perfect Plum, Pear Pizzazz
  • Ink: Perfect Plum, Wisteria Wonder, Elegant Eggplant, Pear Pizzazz
  • Other: Stampin' Trimmer with Rotary addition and Tiny Wave cutter, Label Bracket, 1¼" and 1-3/8" Circle punches, Signo white gel pen, Raven Trim Lace (retired) , Black Flourish designer jewels (retired), dimensionals

Now this picture goes WAY back to 2007. I think this was the last time we took all of the kids out trick-or-treating together. Sigh.... I miss those days...
Charlene was a Zombie Prom Queen (one of her own dresses and some clearance bin costume makeup), Dakota was the invisible man (sunglasses, a hat, and an ACE wrap!), David was a werewolf (make-up kit off the clearance rack from the year before), and Geoffrey was a young Obiwan Kinobe (with a light saber toy and some felt sewn into a long vest).  This was the best outside, in the dark, photo shoot I have ever had and some of my favorite shots of the kids. I will be working tonight, so we will see what ER is like in Bemidji compared to Red Lake. It was actually quiet in Red Lake on Halloween :)

Saturday, October 19, 2013

Washi Makes Everything Better

I've been digging through my supplies again lately and guess what I found?! A whole pile of little take-out boxes I had pre-cut with my Coluzzle template! Perfect opportunity to play with a quick idea :)


I made this little box with the Chalkboard marker and the Chalkboard technique and thought I was done. But then I spied my rolls of Washi tape.

Now that adds some pizzazz! It brought this little box from cute to Wow in about 60 seconds! The little bat is stamped with Illuminate ink. I think I am going to have to buy another ink refill for that pad soon, I use it so much :)

My Glimmer brads are finally coming out to play :) I don't use much glitter because I don't always know if something is going to end up in the Operation Write Home box- no glitter allowed there! It makes our soldiers more visible with night vision goggles. But there is no way this box will go, it isn't a card ;)

How about a little more Halloween fun? I found these Zombie Pumpkins on Pinterest! They crack me up! (they are originally from the Martha Stewart site in case you wanted to know...)


Saturday, September 29, 2012

EEEK! and a Pumpkin


Halloween is coming! Halloween is coming! This is such a fun holiday to decorate for. You can let out all of your inner morbid self, oo-oo, ah-ah! Somehow that just doesn't look as spooky typed as it does in my head, lol!

These are treat holders made with the Petite Pocket die and the Core'dinations Early Espresso cardstock. It would make sense that I love this stuff since I have inked and distresses my way through many a project! These whip up so fast and easy, I could make several in a sort amount of time. I used a couple of embossing folders here on just the front flap after I die cut the pocket, then sanded the embossing to highlight the details, very dramatic. The 2½" circle punch made the perfect curve in the image panel for the spider pocket, which was a fun discovery, yeah!
  • Stamps:Spooky Bingo Bits, Teeny Tiny Wishes
  • Ink: Early Espresso, Wisteria Wonder,  & Lucky Limeade or Pumpkin Pie, Early Espresso, & Old Olive
  • Paper: Core'dinations Early Espresso, Lucky Limeade or Old Olive DSP, Very Vanilla, Wisteria Wonder
  • Other: Big Shot with Petite Pockets XL die, Finishing Touches edgelit, Woodgrain & Spiderweb embossing folders, sanding block, Jewelry Tag and 2½" Circle punches, Wisteria Wonder Baker's Twine, Pumpkin Pie 1/8" Taffeta ribbon, dimensionals

Wednesday, October 26, 2011

Dem Bones, Dem Bones!


Another spooky card for you, since Halloween is almost upon us! I am especially drawn to this skeleton guy, maybe it is my career as a nurse, or the macabre sense of humor I was born with that makes me fit in perfectly with my fellow ER nurses and cops, lol! Just ask us about full moons! Or not ;)

This card was the first one I made with this set. I made it blank so I can use it for whatever I want. Over the Hill birthday, Halloween, or just themed to the season Thinking of you.

I dressed it up a little with the Dazzling Details on the spider web and the Baker's Twine. I cannot believe I lived this long without Baker's Twine! It adds such a great touch without the bulk!!!
  • Stamps: Piece of Poison, Wicked Cool
  • Paper: Peach Parfait, Soft Suede, Whisper White
  • Ink: Peach Parfait, Soft Suede, Early Espresso
  • Other: Big Shot with Spiderweb embossing folder, Dazzling Details, Signo white gel pen, Early Espresso Baker's Twine, Champagne Shimmer Paint, Sponge, Stampin' Dimensionals

Tuesday, October 25, 2011

Spooky Surprise

OK, I am not sure how I missed posting these, but I guess this is a better time to post them than in August anyway! I participated in a swap for the Holiday Mini and I picked Pieces of Poison to do my swaps with. I really wanted to use a few new things and wanted to do something cool with the Peek A Boo die, so I came up with this.


But I realized that we demos want cards we can demonstrate using just one stamp set.. less overwhelming to our customers that way :) I mean, we demos have it all, or almost all. But our customers haven't been converted to demos yet, so they are a little more limited.  So....


This is what I actually did for the swap. Only one stamp set used for the whole thing! I have a thing for Crumb Cake if you all haven't noticed this yet. And I must say, I was mighty pleased with this card :)
The cupboard has some Stripes embossed doors on it complete with little knobs! Those mini brads are awesome! I did some stitching with my sewing machine around the edges for some more detail and texture. Really easy to do now that I moved my sewing machine up to the stamping/crafting area.

There he is, that smiling ghoul to greet you! So let me know which is your favorite!


  • Stamps: Hello Doily, Hand-Penned Holidays, Piece of Poison
  • Paper: Old Olive, Soft Suede, Crumb Cake, Naturals Ivory, Rich Razzleberry DSP (Bold Pack)
  • Ink: Old Olive, Crumb Cake, Early Espresso
  • Other: Big Shot with Peekaboo Frames die and Stripes embossing folder, Designer Label punch, 1-1/4" Square punch, Paper Piercer, Silver Mini Brads, Distressing Tool from Cutter Kit, Stampin' Dimensionals


  • Stamps: Piece of Poison
  • Paper: Old Olive, Soft Suede, Crumb Cake, Naturals Ivory, Rich Razzleberry DSP (Bold Pack)
  • Ink: Old Olive, Crumb Cake, Soft Suede
  • Other: Big Shot with Peekaboo Frames die and Stripes embossing folder, Designer Label punch, 1-1/4" Square punch, Paper Piercer, Silver Mini Brads, Distressing Tool from Cutter Kit, Stampin' Dimensionals

Tuesday, October 11, 2011

October Club Projects


Our club meeting went very well this past week, I had a lot of fun with everyone! And we got to eat our cookies too :) We used the Sweet Pressed Cookie Stamps and made some cute Halloween cookies first...

Then we moved on to make these quick and easy cookie sleeves with the creepy Halloween set. The sleeve is super easy :)
  • Stamps: Piece of Poison
  • Paper: Copy paper
  • Ink: Crumb Cake, Basic Black
  • Other: 2½" Circle punch, Corner Rounder punch, Stapler
  1. Cut a piece of copy paper into (2) 4½"x8½" pieces. 
  2. Round Corners on one end.
  3. Fold over not quite in half so that the front is about ½" shorter than the back, the back is the part with the rounded corners.
  4. Punch a partial 2½" circle from the top edge of the front.
  5. Stamp as desired. 
  6. Staple sides closed.
I found you can fit 2 of the shortbread or the sugar cookies in this sleeve.

The special this month is buy 2 Simply Sent kits and get a coordinating stamp set free,  so we made a card with the Simply Sent Great Day kit and I goofed and used the Perfectly Penned set here instead of the coordinating It's Your Day set

The 12x12 page this time was something a little woodsy. I love the Frostwood Lodge paper, LOVE IT! I paired in with the Pines & Poinsettias set from the Holiday mini and can't wait to take a new family photo to put on this page! The mat will hold a 5x7.
  • Stamps: Pines & Poinsettias
  • Paper: Wild Wasabi, Chocolate Chip, Crumb Cake, Frostwood Lodge Designer Series Paper
  • Ink: Cherry Cobbler, Chocolate Chip, Crumb Cake
  • Other: Big Shot with Tasteful Trim and Perfect Pennants dies, 1¾" Circle punch, Bird Builder punch (leaves/branches), Cherry Cobbler Quitled Satin ribbon, Stampin' Dimensionals, Sticky Strip, Distressing Tool from the Cutter Kit, Illuminate Top Coat Smooch Accent Ink
We used to Top Coat Accent Ink to add a little dazzle to the tiny flowers in the medallion. I had just got it and hadn't had a chance to play with it until the ladies came over and Robin was the first to try it!

Until next time, Happy Stampin!

LinkWithin

Related Posts with Thumbnails