Showing posts with label dies by dave. Show all posts

Monday, July 11, 2016

Pop of Pineapple

It is mid-July and it is definitely time for bright sunshiney fruit cards! So here we go with one of the cards I made for a recent swap. I had not played with the Pineapple background stamp much yet and really felt the need to ink it up! So much so that I made a video for this card. Hopefully you enjoy yhe video :)


I am still fine-tuning my video making abilities, and I hope that they are getting better! At least they are getting shorter :) Please leave me some feedback, click like, and subscribe to see more papercrafting videos from me!

 I am in love with pineapples right now. I am not kidding when I say that, between my hubby and I, we go through three fresh pineapples a week right now! I have gotten really good at waiting until they are so ripe, they actually have a coconut flavored undertone. YUM!!! I am going to go have a few bites of pineapple right now while I type this up :)

You will see in the video that I have cut my image into two parts so I can ink them separately.
  1. There is a watercolor wash as the background of this card front, done in Peekaboo Peach. 
  2. Then the pineapple is inked up with Crushed Curry and thumped with a Soft Suede marker, stamped off once, spritzed with water, then stamped onto the watercolor panel. Then the same process is repeated for the top of the pineapple in Wild Wasabi and accented with Emerald Envy. Do the same on the right side of a 4"x5¼" panel of Whisper White as the card liner.
  3. Apply Clear Wink of Stella all over the pineapple.
  4. Stamp the thank you banner from Pop of Paradise in Archival Black ink on a scrap of Whisper White, then die cut with the Paradise Pop die from Dies by Dave
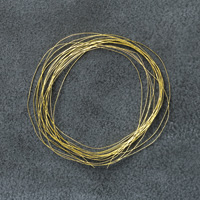
  5. Apply dimensionals to the back of the banner, create a nest of gold thread, and stick to the back of the banner. Adhere to the cardfront over the middle of the pineapple.  
  6. Stitch around the edge of the watercolor panel.
  7. Trim 4" square coasters to fit the back of the panel, adhere to card front. Adhere card liner to the inside. All done!
 You can see the little bit of dimension the coasters give to the card front, and the lovely little banner!
I used a fun die set from Dies by Dave to cut out this banner, and there are so many great dies in this set, you are really going to want them yourself :)

Even on Whisper White the stamping off looks great! This technique gives the image more dimension.

 If you have seen something you need for your crafting life, just click the image in the supply list below and it will take you to my store! If you order less than $150, please use this month's Host Code, which can be found at the top of the sidebar on the right.

And be sure to check the box allowing me to contact you when you check out. I can't send you a thank you card if I don't know your address! And I promise to only send you happy mail, no junk mail :)


Product List

Friday, February 19, 2016

Strawberries and Bricks

Aren't these strawberries sweet?! I used the Market Fresh and Endless Thanks stamp sets on this card.  Here is what I had to say about modifying the sentiment in an earlier post:

You  will also notice that the sentiment on the strawberry image is not the one on the stamp. Lots of people have commented on the possible interpretations of "Just Ripe for You", so I decided to carefully cut that part of the stamp out with my Snips to start the hole, and my rubber scissor to finish the job. And guess what? There are loads of sentiments that fit in the banner! Anything from And Many More...and Teeny Tiny Wishes, one from Watercolor Wings, several from Sprinkles of Life, and so many more!
 I bet there are even more sentiments that would fit in there! And on top of that, Dies by Dave has a die set for Market Fresh :) And I used it for this card!


This card ended up in a stack of 24 thank you cards I gave to a mommy-to-be at her baby shower. She and her mother loved them all, and helped me destash. She was worried that she has wiped out my stock. Yeah, no. I still have more than that in my stash!! I better get to selling those cards, and sending out thank you cards!
OK, here is how I made this card:
  • Cut a piece of Thick Whisper white to 5"x6", score in half, so at 3" on the 6" side. Put the card front into the Brick Wall embossing folder and run through your die cutting machine. 
  • Either cut a Blushing Bride banner to fit, or use a leftover banner from the Chalk It Up To Love Paper Pumpkin kit. Lay the polka dot mask from Happy Patterns set over the banner and color the dots in with a Blushing Bride marker. Outline with Signo white gel pen. Adhere to the carfront.
  • Take a piece of watercolor paper that is at least 2½" square, and stamp the strawberry image and your chosen sentiment in a waterproof ink. Our Archival Basic Black is fantastic by the way! Bold black and waterproof. Color in with an Aquapainter and ink squeezed onto the lids of Wild Wasabi, Garden Green, Cherry Cobbler, and Crumb Cake inkpads. Fussy cut, or die cut with the Dies by Dave matching dies. 
  • Stick a bunch of dimensionals on the back of the strawberries and peel the backing off, then set aside. Create a tangle of Gold thread adn stick to the exposed dimensionals, arranging as you want them. Then stick this whole thing to the banner.
  • Inside the card, stamp the strawberries in the corner of the panel in Crumb Cake. 
  • For the envelope, take a piece of Blushing Bride DSP and cut to the correct size and follow the directions on the Envelope punch board. I have been using retired DSP to make all kinds of envelopes, helping to destash those too! 
  • All done!
As always, if you have seen something you need for your crafting life, just click the image in the supply list below and it will take you to my store! If your order is less than $150, please use this month's Host Code: PCUN2KHD
And be sure to check the box letting me contact you, as I can't send you a thank you card if I can't see your address :)  I promise, I will only send you happy mail, no junk mail!

Product List

Monday, February 8, 2016

A Country Peek

I fell in love with this stamp set, From the Herd, last year when it came out in the mini. But I didn't really use it much. And that would be because sometimes I get a bit overwhelmed with the new stuff and some of it sits unused. I did have a little crafty session with Geoffrey's fiance, Amanda, last spring. This card features the image that she colored using our alcohol markers that are now retired. Mine still work fine to this day, lucky me! What really made me use this image was the set of dies Dies by Dave made to coordinate with this set. I am such a sucker for coordinating dies, I can't even tell you how many I have!

Look at these funky fellas!! I adore them. And Amanda did a great job of coloring them :) They have been cheering me up hanging above my work space in my crafting area since the night she colored them. Now it is time for them to go cheer someone else up :) I just love the unconventional colors she used for the critters. Don't you?

 See, its a get well card! I am thinking this will go to a co-worker recovering from knee surgery :)

Do you have this set? And what crazy things have you done with it? Enquiring minds want to know! Leave me a comment telling me what you have done, or would do with this set.

Ok, these are the supplies I know for sure were used. I would be guessing at the colors that the animals were colored with. I think that these would be darling watercolored, of course :)

As always, if you seen something you need for your crafting life, just click the image and it will take you to my store! If your order is less than $150, please use this month's Host Code: PCUN2KHD

Product List

LinkWithin

Related Posts with Thumbnails