Showing posts with label anniversary. Show all posts

Wednesday, February 10, 2016

Valentine Countdown #8: For the Love of Rainbows

I am in the mood for a rainbow. Rainbows make me happy :) When I saw the the Over the Rainbow set in the Annual Catalog, I knew it needed to come home to momma! And yet, this is the first thing I have made with this set.

This card is full of vibrant color and is all shimmery from the Pearlized Water I used to wet the watercolor paper. It came together very quickly, and I am feeling the urge to make it again, lol! Here is how I made this card:
  • Cut a piece of watercolor paper to 4"x5¼". Take the Happy Heart embossing folder, open it up. Now, there are a few ways to apply the ink to the embossing folder. I happen to have all of the ink colors in the ink spot sizes, so I used those to rub the ink onto the folder. You can also use markers, sponges, or daubers to apply the ink. Just apply strips of color over the side with the Sizzixx insignia on it. Then spritz the watercolor with about 3-5 pumps with the spritzer filled with either plain water or Pearlized Water. Lay the wet watercolor paper wet side down onto the inked part of the embossing folder, close the folder, then run it through your die cutting machine. Allow to air dry, or speed it up with your heat tool. Stitch around the edges with a sewing machine. Apply foam tape or a bunch of dimensionals to the back and adhere to a Thick Whisper White card front.
  • Punch a heart out of thick Whisper White card stock. Take a scrap of vellum at least 2½" square, wipe with an embossing buddy, and stamp with the sentiment in Versamark. Sprinkle with Gold embossing powder, heat with heat tool until the embossing powder has all melted and turned shiny. Use the heart framelit from the Mini Treat Bag dies to cut the sentiment out. Lay over the white heart you punched earlier and stitch a line just under the first line of the sentiment to hold the hearts together. Apply dimensionals to the back of the white heart. 
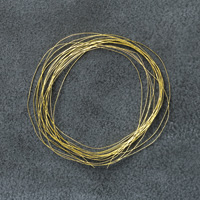
  • Unwind several inches of the Gold thread and wrap it around 3-4 of your fingers to create a tangle. Peel the backing of the dimensionals on the heart and stick the thread to them, arranging as desired. Stick this all to the card front. 
  • On the inside of the card, stamp the big outlined word "Rainbow", then color in with an Aqua-painter or a blender pen with all of the colors used on the front panel. 
  • All done!
You can see the dimension and the gold thread better from this angle. I did take these pictures outside, but it was too cold and windy to do this in the winter! I am glad that my frozen fingers were worth how these pictures turned out anyway :)

The cardstock did warp a little bit from the use of the Aqua-painter, so if that would bother you, then I would use a blender pen.

Now, are you going to try this one yourself? I want to see!! Post a link to yours in the comments pretty please :)

And if you would like to purchase some of the items I used today, here are some convenient links to help you out :)  If your order is less than $150, please use this month's Host Code: PCUN2KHD

Product List

Sunday, October 5, 2014

Stamp Review Crew: Work of Art Edition

http://stampreviewcrew.blogspot.com/2014/10/stamp-review-crew-work-of-art-edition.html

Happy October! We are back to review another stamp set from the Stampin' Up! Annual Catalog. This set just came out this spring, and there are so many ways to use it!
If you are following along from the beginning, I am the first stop this time! If you started somewhere in the middle and are following around the loop, then you just arrived from Nancy Smith's blog. I can't wait to see what she made! If you get lost, you can always find your way back on track on the official Stamp Review Crew blog post for this hop, where the links always take you exactly where you want to go :)
I have 3 cards for you today, and I think I used this set differently than you have seen it used a lot.

 For this card, I used the heart and the long streak stamps. I must have been in a hearts and rainbows mood :) The colorful strip is watercolor paper that I stamped a rainbow of streaks, then spritzed with water. Then I used the heat tool to dry it quickly and restamped the rainbow streaks again. This gave the strip lots of fun color with depth.
The hearts are stamped on Pool Party cardstock with Versamark and then Pearl Perfect Pearls was brushed on.
I colored the rhinestones with Blendabilities markers. I love that I can color my embellishments to match this way!
I had to stamp some more hearts on the inside.I think that little heart stamp gets left out of the fun :)

I had an extra piece of this DSP that I made with MDS. I printed one of the patterns from Back to Black onto a 12x12 piece of Crumb Cake cardstock, then cut it into 6 card fronts. I used the other card fronts on a series of cards featured in these posts: Thank You Lines, Fruitwood Birthday, Sponged Fruit Hello, and Dappled Fruit.
For this card, I just stamped over the DSP with several colors and the long streak image. I must have a thing for that image, I sure used it a lot! I then stamped the "thank" and "you" images from the Work of Art set in 2 colors and then punched it out with the 1-3/8" Circle punch. The other 2 circles are from the Circles framelits. More coloring with Blendabilities on rhinestones to add just the perfect touch. I know they look like pearls on the photo but they really are rhinestones. It must be a trick of the lighting.

I added a row of dots down the side of the inside panel, and the "so much" image from Another Thank You.

My last card I actually used as a wedding card this weekend, so glad I had it on hand! Lots of images from this set got used on this card.
I cut out a piece of Strawberry Slush cardstock with the large label from Apothecary Accents framelits, then used Generational stamping with the long streak stamp (again!) in Strawberry Slush ink, and filled in between with the retired Illuminate ink (I love it so much, I bought 2 ink refills for this ink pad). Then I pierced around the label with the coordinating Paper Piercing Pack, and outlined with the white gel pen.
I punched out a few Whisper White hearts and stamped them with the chevron, the circle, and the smaller paint swoosh images in Strawberry Slush and Crumb Cake-again with the generational stamping. I outlined the hearts with a Basic Black marker to make them pop a bit more. I stamped "Happy Together" from And Many More in black ink on the center heart.
Then I decided I needed a couple of little burlap hears, so I took a 3" piece of Burlap ribbon and covered the back with Sticky Strip, then die-cut 2 of the smallest hearts from the Hearts framelits.
This time I colored some pearls with the Blendas, so pretty!
The Crumb Cake panel is embossed with the Arrows embossing folder, and the card base and the Crumb Cake panel have the corners rounded. All of the elements are popped up on dimensionals.

Inside there is more outlining with the black marker, and some more generational stamping with the long streak stamp and Strawberry Slush ink.

That's it for me! It's time to go check out what Ann Schach has created. She is a genius!!

http://www.stampinchic.com/2014/10/the-stamp-review-crew-work-of-art.html

http://iguanastamp.wordpress.com/2014/10/05/stamp-review-crew-work-of-art


Rainbow and Hearts card supplies:
Built for Free Using: My Stampin Blog

Wednesday, September 17, 2014

Dotty Anniversary

I am now in catch up mode, as I have made several projects in the last 3 months that I never had time to photograph and post. This is one of those cards.
I fell in love with the Dotty Angles set and was so excited to use it as soon as I got my first order from the Annual Catalog! And I never have enough wedding and anniversary cards, so that is where I went with this. In fact, I sent this card to my oldest son and his wife for their 1st anniversary before I even posted this :)
I played with all kinds of new goodies on this card! I had not gotten the Dazzle markers when they were in the Holiday Mini last year, so I snatched those puppies up as soon as the new catty went live. It made a lovely outline for me on the card front. I stamper the Dots image several times down the card front creating a confetti look with Whisper White and Coastal Cabana ink. The sentiment is stamped in Silver Encore ink. Love that stuff too! Add some Silver satin and White Cotton ribbons, some In-Color Sequins, and rhinestones, and we are set!

In retrospect, I should have stamped the sentiment in Silver. Oh well! Sometimes we just have to be happy with the results anyway :)


LinkWithin

Related Posts with Thumbnails