Showing posts with label missing you. Show all posts

Tuesday, August 30, 2016

Creative Crew: Rainbow Spotlight

We all need some encouragement in our lives sometimes. And rainbows. Lots and lots of rainbows!! This card is the result of the Creative Crew Catalog Focus challenge this month. Take a tutorial from Splitcoaststampers.com and use your favorite new SU product.

Well, I am loving the new In-Colors!! I can't get enough of them! And I used a couple of them on this card with the Spotlighting technique. I don't have a MISTI, so I had to improvise a bit and plan for some wiggle room :) Here is how I did it:
  1. Cut a piece of Crumb Cake cardstock to 4¼"x11", score in half at 5½". This is the card base.
  2. Cut a piece of Crumb Cake to 4"x5¼". Cut a piece of watercolor paper to about 1½"x4½". 
  3. Stamp Rainbow on the watercolor piece with part of it off the bottom, use Archival Black ink. Color each letter a different color in rainbow order with an Aqua-painter: Real Red, Peekaboo Peach, Daffodil Delight, Cucumber Crush, Dapper Denim, Bermuda Bay, and Rich Razzleberry. 
  4. Lay the watercolor panel down on the Crumb Cake panel where you want it to be. Ink up your image with Crumb Cake ink, then slide the watercolor panel up until you can stamp the image where the watercolor panel with overlay it, but you can still use the panel as a reference. 
  5. Repeatedly stamp the rainbow image all over the Crumb Cake panel and alone the bottom edge of the inside of the card base.
  6. Lay the watercolored panel over the image you intend to spotlight and trim down to the right size, starting with the ends, and trimming the top down to just above the image. By leaving extra paper to begin with, it gives you wiggle room to adjust the angle and the centering of the image.
  7. Stamp the other pieces of the sentiment in Archival Black ink above and below the panel.
  8. Outline the Crumb Cake panel with a white gel pen or chalk pencil.
  9. Apply dimensionals to the back of the water color panel and adhere to the Crumb Cake panel. Then apply dimensionals to the back go the completed panel and adhere to the cardfront. (I am still using coasters for all of this). All done!
 Here is a side view which shows all of the dimension, and a peek at the stamping inside. I made this a top-fold card, just because I felt like it!

Have you tried the spotlight technique? I think it has a lovely and dramatic feel!

If you have seen something you need for your crafting life, just click the image in the supply list below and it will take you to my store! If you order less than $150, please use this month's Host Code, which can be found at the top of the sidebar on the right.

And be sure to check the box allowing me to contact you when you check out. I can't send you a thank you card if I don't know your address! And I promise to only send you happy mail, no junk mail :)

Product List

Wednesday, January 6, 2016

Sunset on the Beach


And I am back with another one of the cards I made from the treasures I found when cleaning off my desk back in October! I think I made 9 cards that day in about 2½ hours!
Winter is definitely in full swing here with snow and wind and chilly temps, I know I  could stand to be looking at a sunny beach :)

The treasure I found on my desk was a piece of watercolor paper with the birds from Wetlands stamped in black. I did not have to cut it down, I was able to just watercolor over the birds with reinker and an Aquapainter, then sponge on the rest of the color. I even managed to sponge a nice round sun using one of the Mini Distress pads from Tim Holtz.
After all the sponging was done, I stitched around the border, stamped the "sunshine" and adhered the "hello". The lace was adhered to the card base, then the watercolor panel was adhered using dimensionals.


I repeatedly stamped the birds in black across the inside of the card and used markers to ink up the inside sentiment. I LOVE this card! I will be sending it to someone special very soon :)

What do you think? Do you like this card? Wanna make it too? Here are the supplies I used.


Product List

Sunday, March 15, 2015

Stamp Review Crew: Project Life Point and Click Edition

http://stampreviewcrew.blogspot.com/2015/03/stamp-review-crew-project-life-point.html
Hello from the Caribbean everyone! I just had to say that because I am so, so excited to be on our very first cruise as this post goes live!! OK, back to business. Welcome to the next edition of the Stamp Review Crew! We have lots of great inspiration for you here :) If you have never hopped with us before, we are a group of Stampin' Up! demonstrators that do a blog hop every 1st and 3rd Mondays of the month, and each time we pick just one stamp set for us all to use. If you want to see the master blog hop list, you can find it on the official Stamp Review Crew blog here.
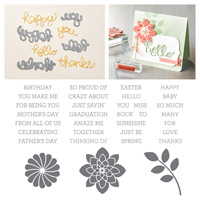
If you are following along in order, then you just arrived from Martha Inchley's blog. Wow, right!

My first card for you is this very talkative card. It is just full of love! I only used 2 stamps from the set, and 1 from another  I chose colors that kept it gender neutral, even more towards the masculine, though. Since I have so many guys in the family, that keeps it more useful for me. It would be cute in any color though, I think.

You can see the little word bubble I put on the inside here. I had to add more little hearts. Of course, there is some white gel pen going on inside and out :)


Next up is a card that I made using the Nacho Average Color Challenge. That was a tough one for me at first because I did not think those colors went together, but this card proved me wrong :) Again, I used just 2 of the images from Point & Click, and the sentiment is from the monthly photo-polymer release from February.


Inside is a repeat of just one design row and some more of those stars. And white gel pen, lol.

That's it for me! I will be thinking of all of you on Monday as we are cruising! I'll be back next week, and I hope to share some great photos with you all then. It is now time to hop on over to Dawn Tidd's blog. I can't wait to see what she has created!


http://tiddbitsfromdawn.typepad.com/tiddbits-from-dawn/2015/03/the-stamp-review-crew-project-life-point-click-edition.html
http://www.inchofcreativity.com/2015/03/stamp-review-crew-project-life-point.html

Sunday, March 1, 2015

Stamp Review Crew: Sheltering Tree Edition

http://stampreviewcrew.blogspot.com/2015/03/stamp-review-crew-sheltering-tree.html
Can you believe we are so far into this year already! It is just flying by, just like last year did, lol! It is the first Monday of the month, which means it is time for another edition of the Stamp Review Crew. This time we are featuring a wildly popular set from the Occasions Mini. Almost every demo I know has purchased this set. It is so very versatile, good for any age, gender, and occasion. If you don't have it yet, you are going to need it by the end of this hop, I can guarantee it! I think this set just cries out to be used with techniques :)

As always, this hop is set up in a loop with links that will always take you directly to the posts for the hop. If you get lost along the way, or just want to see the full blog roll, click on the banner at the top to go straight to the Stamp Review Crew blog post for this hop.

If you are following along in order, you just came from Betty Traciak's blog. Fabulous, right?! I am stop #15, and here is what I have made for you all to enjoy!

My first project is a subdued general card. I thought about using a sympathy sentiment, but decided to keep it open to use for just about anything.
  1. I used a panel of watercolor paper and embossed the tree with White embossing powder.
  2. Then used my Aquapainter to alternate stripes of Crumb Cake and Sahara sand. 
  3. After drying, I stamped the leaves on with Mossy Meadow, but I only inked up once and just kept stamping. I then went back and wiped off the excess ink from the white trunks. 
  4. Then I cut about 1½" off the bottom of the panel, marked the placement lightly with  a pencil on the card base, and stamped the sentiment in Early Espresso. 
  5. I then laid the remaining portion of the panel on the card base to figure out how much to trim off the top to get it the right size.
  6. Stitch around the edges, pop up on dimensionals. Front is done.
  7. Stamp the tree trunk with Whisper White ink on bottom right corner of inside of card. Then stamp leaves in Mossy Meadow. 
  8. Outline inside with Signo white gel pen. DONE!
Built for Free Using: My Stampin Blog


Here is what the inside looks like. The Mossy Meadow does a nice job of overlapping the white tree trunk. You can see the dimension here on the card front also.

Next up, I wanted to use those adorable little bikes! I love that there are 2 stamps for this image, it makes it really easy to make the frame bright and shiny :) I used 2 embossing powders for the bike frames. I must admit, I was thinking of our Heidi Baks when I made this card. She is quite the mountain bike racer!

Built for Free Using: My Stampin Blog


I did not emboss the bikes on the inside. I was just too lazy :)


This is my last project, and the watercolor background takes center stage here. I just love how this turned out! It was pretty easy too. I was going for a soft and artistic feel with this card. I adore the font of the sentiments in this set! Isn't it just gorgeous embossed here? I must confess, I used the retired Pewter embossing powder here. I love that stuff so much, I bought a backup container of it before it disappeared. But, I am sure it would look lovely in Silver also :)

Built for Free Using: My Stampin Blog

Another view, because the picture turned out great and I couldn't waste it, right! The hearts are leftovers from Valentine's card, Confetti Heart punched Dazzling Diamonds Glimmer paper.

 To decorate the inside, I just took the trimmings from the front panel and adhered them the right side edge. I wanted to continue that soft blended look with being overpowering.


That's all for me! I hope you liked at least one of these. Please, leave a comment and share your thoughts with me, it means so much :)

Time to head on over to Bronwyn Eastley's blog where she is sure to WOW you (and me too!).


http://addinktivedesigns.blogspot.com/2015/03/the-stamp-review-crew-sheltering-tree.html


http://kittystamp.blogspot.com/2015/03/stamp-review-crew-sheltering-tree.html


Challenges used:

1st Card:

http://casethissketch.blogspot.com/2015/02/case-this-sketch-112.html


3rd Card:

http://freshlymadesketches.blogspot.com/2015/02/freshly-made-sketches-175-sketch-by-jen.html
 http://thepaperplayers.blogspot.com/2015/03/pp234-lauries-theme-challenge.html

LinkWithin

Related Posts with Thumbnails