Wednesday, April 30, 2008

More Address Books

Ok, so I took the first address book and card to work for everyone to contribute to before we gave it to our departing coworker and everyone loved it! "You should sell these!" Was something I kept hearing. So I went home and made 2 more, trying to see how long it would take and if it could be profitable. It took me about 5 hours to make 2 of these little beauties! So I would have to charge about $16 to make $5/hour and pay for the materials. I didn't think anyone would pay that, but one coworker already has, for $15! This is not something I would make and think I was earning alot, but if I just made some now and then to sell, and it didn't feel too much like work, I might do it. I can make much better money other ways and I always say work smarter not harder, but as long as this is still fun to make, what the hey! Why not.
So this is ALmost Amethyst, So Saffron, and Vintage Violet. I didn't have ribbon to match, so I used reinkers to die some in each color. The ribbon in the ribbon slider looks more amethyst in real life. I shouldn't have taken this photo in the basement, I couldn't get the right lighting! I used the Cuttlebug Textiles embossing folder and rubbed the raised parts with Vintage Violet ink pad. This is the inside of the amethyst book, using Baroque Motifs set with the Saffron, Amethyst, and Violet inks.
This is the So Saffron front, using the Stylized Flowers embossing Folder. I used Amethyst and Saffron dyed ribbons on it.
This is what the pages look like on both books. There are lots of putzy little details in this project. I used a marker to distress the edges of every Round Tab punch, and stamped the starburst/flower thingy in 2 colors on the edge of each page front and back and there are 24 pages. I also attached the tabs with 2 eyelets each. I had to punch all the holes in all the pages and the covers, I could do 2 covers at a time and 5 pages at a time with my Crop-A-Dile, LOVE that thing! The hardest part was trying to find enough coordinating eyelets from my stash!
And this is the inside cover of the Saffron book. I think I really like the alternating color thing.

Friday, April 25, 2008

Going Away Present

One of the nurses I work with is leaving us to go back to her home state, and I wanted to give her something to remember us by. So I made her a card and mini address book. I think they turned out pretty well!

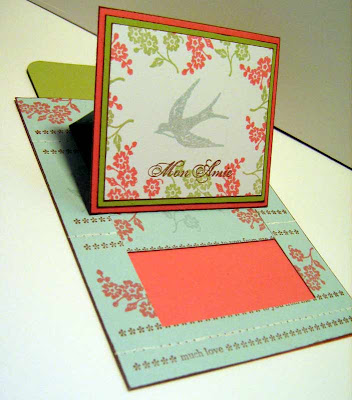
Here they are together. I decided to try making a Trifold Pocket card. I have never made a coaster book before but after a bit of fiddling it all worked out. I brayered some Close to Cocoa ink on the back of a sheet of textured Soft Sky paper to give it the 2-sided look. I still have a stash of the gold and silver elastic cord from SU and I tied it trough the eyelets, then tied the ribbon to the cord on the outside. That took me a while to figure out! I also made tabs with letters on them to help thumb through the addresses quickly. I had collected a bunch of contact info from people at work, typed it up on my break, then forgot to email it to myself! Ugh! I had planned to fill it all in before we give it to her. Oh, well, it'll still get in there, just not right away!
Close up of the card.
Stamps: Boho Backgrounds, One of a Kind
Paper: Chocolate Chip, Soft Sky, Groovy Guava, Whisper White
Ink: Chocolate Chip, Soft Sky, Groovy Guava, Versamark
Accessories: Rhinestone brads, large and mini eyelets, CAD, Iridescent Ice EP, heat gun, circle punches, Cuttlebug and square Nestabilities, double stitched Soft Sky ribbon, Chocolate Chip polytwill ribbon, gold and silver elastic cord, paper piercer and mat pack, choc chip marker, Silver Hodge Podge ribbon slider, crystal effects, Cosmo glitter, Round Tab punch, sponge

Close up of the address book. I might have to make more of these, now that I have it figured out!


Inside view of the address book. It does open and lay flat easily. I was worried that it would be cute, but not functional, but it really is great!

I hope my friend loves it!

Monday, April 21, 2008

We had a great time at Retreat this weekend, stamped alot, laughed alot, ate alot, slept a little!
;) We definitely have to do this again, and next time I need to take a group photo! As it was, I didn't remember to take pictures of the challenge entries until right before the last few people left, so I only have some of them. Sorry Sara, Mary, Mary K., and Elli!
Sandy was definitely the Queen of staying up late, even though I forgot to pack underwear and had to drive home in the middle of the night on Friday to go get some! Good thing I only live 6 miles away...
Elli completed 16 pages! WOW! Deb proved her creativity this weekend, playing with her toys for the first time outside of Stamp Club... Sara joined our little family, Welcome Sara! She already makes beautiful pages of her darling boys. And Dawn, wow, I don't know how many cards you made, but you made a ton! Thanks soo much for bringing your stash to share!

This is Sandy's entry for our first challenge of the weekend :

  • flower
  • fibers
  • red

And these are some cards from our second challenge, Dawn, Kathy, and Sandy's. Great Job! Kathy even used the sketch!

  • Blue
  • Yellow
  • Green
  • Glitz

These are for the third challenge. Left top Dawn, left bottom Deb, middle 2 Kathy, right Sandy. Everyone used the sketch this time and Dawn and Deb used all the options! And what a creative way to include the squares Sandy!

  • Brown
  • Pink or Blue
  • Squares

The top left is Kathy, top right Dawn, middle Sandy, and page on bottom Deb for the last challenge. Everyone does such a good job and I think the sketches were a hit!

  • Purple
  • Tan
  • Stars
  • Metallic

This is the nugget box that Sandy made when we did Stamp Club projects, LOVIN' the color combo of Teal, Red, and Choc Chip!

Everyone got alot done, except me. I did 3 pages, yep just 3 lol! Maybe I'll post them later, but for now enjoy these wonderful ladies creations!

Thursday, April 17, 2008

Stamp Club Projects for the Retreat

I am posting a couple of the projects we will be doing on Saturday evening for Stamp Club at the retreat. I am so excited! Tomorrow will be a busy day setting up and getting everybody started on a fun-filled weekend!

This is a slider card that I made with Mother's Day and birthdays in mind. The cutting and scoring will be a new thing for most of you.

This is a view of the card open. You can stamp another image inside or write a message or both!

This a close up of the scrapbook page we will be doing, lots of Spring color here and something new to do with cardstock!

Can't wait to see everyone tomorrow!

Friday, April 11, 2008

Sign up for Potluck at Retreat

Ok, we have 10 people signed up for Retreat, still room for 3 people to spend the night, or a total of 8 more people at the tables.
Anybody else that wants to sign up, I plan to go pay in full on Wednesday after I get off work, so please contact me ASAP and get your payment to me by then.

We have 6 meals and 4 snacks to divvy up so let me know which one you want to do. This is a BYOB event also. I will bring some coffee, tea, and crystal light, but anything else is up to you. Please bring a water bottle so we can avoid open cups at the tables.
  1. Friday supper-open
  2. Saturday breakfast-Kathy and Sandy
  3. Saturday lunch-open
  4. Saturday supper-Dawn
  5. Saturday snack #1-Kathy and Sandy
  6. Saturday snack #2-Dawn
  7. Sunday breakfast-open
  8. Sunday lunch-open
  9. Sunday snack #1-open
  10. Sunday snack #2-open

I will edit this post as more have signed up. Also if there are any food allergies, let me know. So far here is a list of allergies I know about:

Apples with skins

Shrimp,seafood

Coconut

Strawberries

Cantaloupe

Pecans, walnuts

Wednesday, April 9, 2008

I GOT IT!

Ok, after 2 tries, I finally got my new Crop-A-Dile Big Bite! I am soooo excited! this thing is sooo cool! Now I can put eyelets and snaps and stuff ANYWHERE on a scrapbook page! And yes, I will bring it to the retreat for everyone to play with :)
And I promised a list of my Cuttlebug stuff so here it is!
Embossing folders
  1. Stylized Flowers
  2. Tiny Mosaic
  3. Tiny Bubbles
  4. Heart Blocks
  5. D'vine Swirls
  6. Bloom Dots
  7. Snowflakes
  8. Textile
  9. Spots & Dots
  10. 2x2 Decorative Stars

Alphabet die sets

  1. Olivia
  2. Hippie Chick
  3. Red Tag Sale

3x3 Dies

  1. Concentric Hearts
  2. Baby #2

2x2 dies

  1. Snowflake #2
  2. Arrows
  3. 2-step Paisley

sets of 4 2x2 dies

  1. Tiny Tags
  2. Asteriks
  3. Flowers #1
  4. Stars
  5. Sliders
  6. Stamps

Nestabilities

  1. Plain circles small
  2. Plain circles large
  3. Scalloped circles small
  4. Scalloped circles large
  5. Plain Squares small
  6. Plain Squares large
  7. Scalloped squares small
  8. Scalloped squares large

If you want to see what these look like, here is the site I actually bought most of these from and it has pictures of them. Oh, except for the Nestabilities. You can find out about those here. Feel free to bring any that you have to use also! The more variety we have the better. Of, course if you are not comfortable sharing your precious, hard earned toys, we will understand :)

Saturday, April 5, 2008

More Ways to Win at the Retreat!

So, my next brainstorm for the Retreat is that we will have some Challenges! I will present a layout sketch, theme, technique, specific products, colors, etc to be used in the challenge-any one or a combination of any of the above, and give you 2 hours to complete it. Then you can enter it for a prize- we will all vote to see who's is the best! We will have 1 challenge Friday evening, 3 on Saturday (morning, afternoon, and evening) and 1 on Sunday. I'll try to have some back-ups available if these aren't enough. Of, course participation will be completely voluntary :)


And for those who don't want to do scrapbook pages, you can do card challenges using the same challenge elements, we must include everyone you know! But cards get a 45 minute limit... more fair that way...Here is an example of a challenge:
Spring in Minnesota
  • use green for the fresh greenery we hope to see any day now
  • use brown for the MUD that we all know is the real meaning of spring here :)
  • use some ribbon, fibers, fabric, twill tape, or felt for the "fluffy" stuff we still get, you know, that dirty word.... snow!
Here is my example:


Stamps: Roughin It

Paper: Kraft, Wild Wasabi, Chocolate Chip

Ink: Chocolate Chip, Summer Sun, Pumpkin Pie, White marker

Accessories: felt, polytwill ribbon, clear embossing powder, heat gun, CM circle cutting system, Cuttlebug Olivia alpha dies, paper piercer and mat, needle and embroidery floss, Crop-A-Dile and MM snaps, Xyron machine, Cutter kit distressing tool


Here is a close up of the title logo- fun to make! I Inked up the flame stamp with versamark then with the Summer Sun and the Pumpkin Pie, then stamped onto the paper. I did this several times, cleaning the stamp between each image. Then embossed with clear EP. Makes it kind of shiny in real life.

And a close up of the flames. Fun to make, but time consuming! I would have been better off using the sewing machine to stitch the ribbon down. I think that took me 45 minutes!

LinkWithin

Related Posts with Thumbnails