Thursday, January 28, 2016

Peace Rose Birthday Blossom

Right before Christmas, I found the Gansai Tambi watercolors at a price I was finally willing to pay, so I bought them and waited to play with them. I have been watching the price on them for about a year, and have been wanting them so much, I was giddy when the box arrived. And I must say, they are everything I had hoped they would be :) Now add this beautiful stamp set, and I got magic I tell you!!

I watercolored this entire panel, and I had so much fun with the blending and layering of colors. I already love to watercolor, but this made it so much more fun. There is a light sheen to the color after I added a little of the pearly paint over the flower, but you can also tell that it is paint, not ink. I used a bright yellow and a coral red or the orange to blend the petals. The color reminds me of a peace rose, which my mother grew long ago on the farm.

ETA: For those who already have the Gansai Tambi watercolors and would like to know which colors I used, here is what I think I used, since it has been over a month since I painted this, lol.
  • #40 yellow
  • #31 coral-red or #33 orange 
  • #58 green
  • #50 creamy turquoise 
And, while Stampin' Up! has fabulous watercolor paper, I use Canson 140# cold press paper that I can get in a big 9"x12" pad at my local stores for about $6 with 25 sheets. It is a great watercolor paper for my purposes, and affordable enough for me to use scads and scads of it :)
 
I tried to catch the depth of the colors and the sheen of the paint, but it still looks better in real life :)
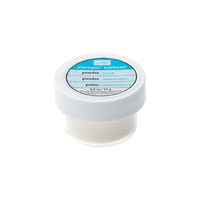
I embossed the image with White embossing powder, which helped corral the colors where I wanted them :)

What do you think? Love it? Hate it? I am sure I will show more Gansai Tambi painting in the future :)


Product List

Monday, January 25, 2016

Christmas in January: First in the Series


I am going to try something new this year. I thought it was something we would all enjoy, and who doesn't need more joy :) I will post a Christmas card every month on the 25th to keep us all inspired and to build up our stock of cards to send next year. So here we go with Christmas in January!

It is a snowy day across the areas of the US that get snow, including my house. I am watching big fluffy flakes fall as I write this post. So pretty! My crazy dogs all love to go out and roll in the fresh snow, so it has been quite the revolving door, lol! We live out in the wilderness, so we can let them out unsupervised, one at a time. That's a good thing, since a single in-&-out cycle of one-dog-out-at-a-time here can last for 2 hours! I also got the unexpected bliss of getting to take some of my Use-or-lose vacation hours this week, and I don't have anything else planned since I was going to be working :) Bonus crafty time!!
This card just popped into my head almost fully formed. I love that! I wanted the sentiment to weave through the wreath, and to have pretty white berries on the wreath. The rest was the result of what was laying on my desk. Yes, my desk is rather messy at times...
And here is how I made this card:
  1. Take a piece of Crumb Cake card stock that is at least 4"x4", cut the center of the wreath out with the framelit. 
  2. Stamp the wreath in Mossy Meadow. Stamp the just-a-few-leaves stamp in Mossy Meadow again. This makes those leaves just slightly darker than the rest. 
  3. Dry the ink with the heat tool, wipe with the Embossing Buddy so the embossing powder doesn't stick tot eh wrong stuff. Stamp the berries in Versamark. Sprinkle with White embossing powder and heat set.  
  4. Die cut the outer edge of the wreath. 
  5. Cut a piece of Whisper white to 4"x5¼". Emboss with the Softly Falling folder. 
  6. Cut a strip of DSP to 2"x5¼". Adhere to the left side of the White panel, leaving about ½" of white exposed to the left of the panel.
  7. Cut a piece of Vellum to 1-3/8"x4". Wipe with Embossing Buddy, stamp sentiment in Versamark on the Vellum. Sprinkle with Gold embossing powder, and heat set. 
  8. Weave the vellum strip through the wreath, flip over and apply dimensionals to the wreath all the way around, Some of the dimensionals will be stuck to the vellum. Stick this down to the White panel after getting your placement the way you want it. 
  9. Optional: Stitch around the panel with sewing machine.
  10. Adhere completed panel to a Crumb Cake card base. 
  11. Ink up the bow stamp in Cherry Cobbler, stamp off once, the stamp in the center of the inside of the card. Stamp the greeting message in Early Espresso over the top of the bow. 
All done!


This is what the inside looks like. So, what do you think? Will you be pulling out your Christmas stamps with me for the year? Please comment below to share your thoughts!

And if you would like to purchase some of the items I used today, here are some convenient links to help you out :)  And if your order is less than $150, please use this month's Host Code: PCUN2KHD


Product List

Friday, January 22, 2016

Stampin' Addicts 2016 Occasions Mini Blog Hop: Birthday Blooms


http://forums.stampinaddicts.com/threads/occasions-blog-hop-coming-on-friday.9190/
It is time for the annual Stampin Addict's Occasions Hop! I know you have all been waiting for it ;)
Each of us will be featuring a different Stamp set from the new Occasions Mini, and I can tell you right now, it was hard to pick just one for me! This catalog is packed with great stuff!

If you are following along in order, then you just arrived from Mickey Roberts' blog, and didn't she do an amazing job with Party with Cake and the pop-up dies?! That is a hard act to follow :)


My first card fills a need I have, a co-worker just lost his father and we need to give him a card. So, kill two birds with one stone, right! Oooh, bad pun to choose, sorry!
Now, we have the fabulous Color Me Irresistible DSP that has these resist patterns, and you can sponge or spritz color on them. But last year, I got like 5 packs of the SAB Irresistibly Yours DSP that does the same thing. And I could not justify adding more of that kind of paper to my stash. Sooo. Let's pretend that is the Color Me Irresistible DSP, cuz you could totally do this card with that DSP. Or if you have a stash of the SAB version, here is an idea to use it up!
I used the Basic Gray Archival inkpad and a sponge to color the DSP. Then I used a piece of watercolor paper, laid it on the striped paper kittywampus and marked the parts to be cut off with a pencil, then trimmed that off. Then I stamped the single flower in black ink and embossed with clear embossing powder. I wet each portion of the flowers with an Aquapainter, then added Smoky Slate ink with another Aquapainter and let it spread in the water. I worked across the panel a little at a time so the water wouldn't try too fast. I then did the same thing with Old Olive on the leaves and stems. I matted the watercolor panel on some black, then stitched it all together. Then I decided to add a vellum banner with the sentiment embossed in black.

Inside I stamped a sentiment from Heartfelt Sympathy and a couple more flowers. This is done on Smoky Slate so I couldn't watercolor them, but a blended pen worked just fine :) I even hit the leaves on the sentiment.

I have several favorite mugs I use for my many cups of tea a day, and one has some modern styled cobalt blue flowers on it, and I have a matching 8 cup tea pot for that mug! I used to have two mugs, but one bit the dust on our concrete floor. My main living space is a walk-in basement, thus a concrete floor, and a need to replace dishes more often than the average home. I don't mind too much. I love pretty dishes, and if something breaks, I get to buy something new that I adore :) ANYWAY! That is what inspired these cards.
The card on the left is done on Whisper White and I used a blender pen to blend the stamped image color to fill the images. Then I went back and added more color with the blender pen and ink from the Pacific Point inkpad. And topped that off with some Wink of Stella :)
I was trying really hard to not just do watercolor projects. Sometimes I just can't help it though, and this set just begs to be watercolored! So the card on the left was stamped in Pacific Point on watercolor paper, then quickly sprinkled with clear embossing powder and heat set. I used an Aquapainter to wet the areas to be watercolored, and then I noticed that there was a faint blue tinge being moved around. Apparently the Pacific Point ink was not completely sealed in with the embossing powder! That's ok, it worked to my advantage as I did not have to try to get a uniform watered down ink for the leaves. I wet the areas to be watercolored, then dropped more color in with an Aquapainter. No shimmer on this one :) I also needed a get well card for a co-worker who is having knee replacement surgery this week, so I used a sentiment from Best Thoughts. Both sentiments are embossed with Silver embossing powder.

The cardbase for both of these is Whisper White Thick cardstock, and I did the same thing on both of them, adding a wash of pale blue by using a blender pen to pull the color from the stamped image. And I added a layer of Wink of Stella to the flowers also.

Last up is a Mini Treat Bag out of Kraft paper. I just love that little line of hearts, and the font in this set! I used several dies from the Mini Treat Bag set, and just stamped the hearts in Cherry Cobbler, Rose Red, Blushing Bride, and Whisper White. The sentiment is embossed in gold. And the red banner is embosses with the Happy Heart embossing folder.

That's it for me, now it is time to go see what Twila Davis has in store for us using the Number of Years bundle!

http://stampalittlelonger.blogspot.com/


http://paperconversation.typepad.com/


Product List
Heat Tool
[129056]
$49.95
Blender Pens
[102845]
$10.00
Big Shot
[113439]
$110.00

LinkWithin

Related Posts with Thumbnails