Tuesday, August 16, 2016

Creative Crew: Sympathy

Often times when we need a sympathy card, we are just not in a creative state of mind. For that reason, I like to have a stash of sympathy cards available at all times. And they are my biggest sellers at work. So when the Creative Crew Holiday Focus for August was Sympathy cards, I was all over that!

I had bought the Heartfelt Sympathy set this spring, I think, with the thought that it would be a marvelous set for all of those sympathy cards I should crank out. And I paired it with Gorgeous Grunge this time, which is a must-have set in my opinion :)  Here is how I made it:
  1. Cut a panel of watercolor paper to 4"x5¼". Create a 4¼"x5½" Soft Sky card base.
  2. Squeeze your Soft Sky and Peekaboo Peach ink pads to create a puddle of ink on the lids. Use your Aqua-painter to dilute the inks and watercolor a puddle of Soft Sky. Heat set, then repeat in a different but overlapping pattern with the Peekaboo Peach. Heat set again.
  3. Splash clean water on the panel, then dab the water off with a relatively clean cloth. This removes some of the ink in a spatter pattern. 
  4. Then either load your Aqua-painter with leftover diluted ink from the inkpad lids and spatter onto panel by tapping the brush over the watercolor paper, or use the fine spatter image from Gorgeous Grunge to apply some spatters. Dry again.
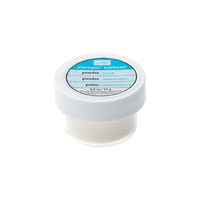
  5. Use Embossing Buddy over the water color panel, then test to see if any embossing powder sticks. If it sticks, brush off, then heat with heat tool and test again. 
  6. When the embossing powder no longer sticks, use the embossing buddy again, stamp the sentiment in Versamark ink, sprinkle with Copper embossing powder, and heat set. 
  7. Stitch around the panel with sewing machine and thread.
  8. Apply dimensionals, (or trimmed coasters if you have a big stash of them like I do), to the back of the watercolor panel and adhere to the front of the cardbase. 
  9. Stamp the second part of the sentiment in Soft Suede inside the card, then stamp the fine spatter image in Soft Sky and Peekaboo Peach from the right lower corner up towards the center. All Done!
 Soft Suede was about as close as I could get to the Copper embossing powder color for ink. Embossing inside the card on the cardbase tends to warp the card a bit, and I just did not want that for this card :)

What is your go-to stamp set for sympathy cards? And do you keep a stash of them?

If you have seen something you need for your crafting life, just click the image in the supply list below and it will take you to my store! If you order less than $150, please use this month's Host Code, which can be found at the top of the sidebar on the right.

And be sure to check the box allowing me to contact you when you check out. I can't send you a thank you card if I don't know your address! And I promise to only send you happy mail, no junk mail :)


Product List


Tuesday, August 9, 2016

Creative Crew: Snorkeling Love!

We went snorkeling for the first time on our first cruise. That was in March 2015, and we were instantly in love! Both of us could snorkel all day long, and at least a couple times a week :) Now, every chance we get, we snorkel.

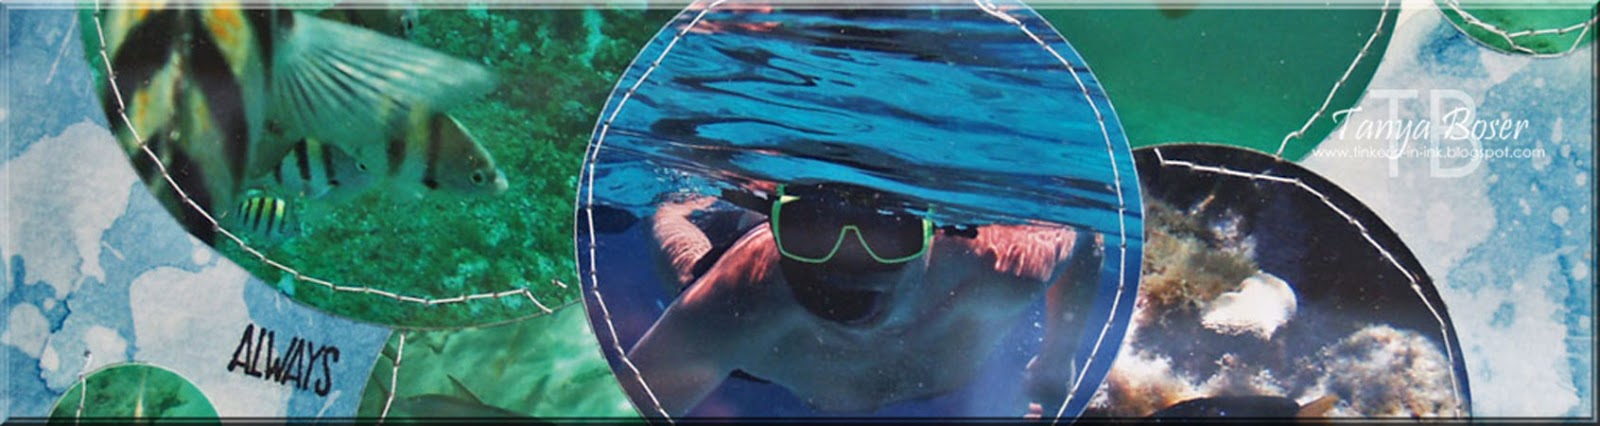
The Scrapbooking and More Creative Crew challenge for this month was to use circles on your layout, and that made our snorkeling pictures jump to my mind! I like to hang these pages in lovely frames in our house, so they are home decor too :) Usually they are of my grandson though, lol.

We took turns with the camera and got lots of great shots of the fish and coral. And a couple shots of each other :) SOOO much fun!!
  1. I cut a piece of watercolor paper to 8"x10". Then I watercolored patches of Crushed Curry, Emerald Envy, and Dapper Denim, layering the colors and drying with the heat tool between colors. Then I splashed clean water on the panel, let it sit for 30 seconds or so, then dabbed it off with a sort of clean clothe. This removes some of the ink colors in splash patterns. 
  2. Then I pulled out my Circles dies and cut out a variety of pictures with 3-4 sizes of circles.
  3. I played around with the circle placement until I liked it, then I lightly adhered the circles with tape runner. Then I decided to stitch them in place with my sewing machine to help highlight the pictures more. 
  4. I took sentiments from Sunshine Sayings and stamped them on the watercolor paper. 
  5. Then I placed the page in an 8"x10" photo frame. All done!
 Here it is in the frame. I was not sure I liked how this was turning out until I added the stitching. Without the stitching, the pictures all seemed to blend together and confuse the eye.

Have you been snorkeling? Did you like it? And what was your favorite part?

If you have seen something you need for your crafting life, just click the image in the supply list below and it will take you to my store! If you order less than $150, please use this month's Host Code, which can be found at the top of the sidebar on the right.

And be sure to check the box allowing me to contact you when you check out. I can't send you a thank you card if I don't know your address! And I promise to only send you happy mail, no junk mail :)


Product List


Sunday, July 31, 2016

Stamp Review Crew: Botanical Blooms Edition

Wow, July is gone already and it is time for another Stamp Review Crew hop! This time we are featuring a lovely flower and foliage set called Botanical Blooms. This set came out in the Occasions Mini this year with a coordinating die set that is gorgeous! I personally did not ink this set up until it was time for this hop, lol. There are so many lovely cards designed with it, I needed to NOT look at all of the inspiration on Pinterest and try to come up with something that was organically inspired :)

For those who are new to the Stamp Review Crew, here is a little background. We are an international group of Stampin' Up! demonstrators that gets together on the first and third Mondays of every month to do a blog hop. Each hop features a single stamp set to give you loads of inspiration for that set! The hops are archived at the Stamp Review Crew blog, and you will be able to click through each hop at any time, going directly to the posts for that hop whenever you want! And you can click on the banner of this post to go to the master blog roll for this hop also.  

If you are following along in order, then you just arrived from Holly Krautkremer's blog where she will fill you with amazement!

This card was inspired by a top I just bought. I love blue. Really. You should see how much blue I have in my wardrobe! And this print got me thinking about how I could recreate it with this set. I hope you will give this a try!
  1. Cut a panel of Crumb Cake to 4"x5¼". 
  2. Stamp the flowers in Blushing Bride and Flirty Flamingo. Stamp the leaves in Crumb cake, and the stamens and leaf veins in Soft Suede. Dry well with heat tool. 
  3. Wipe the entire panel with an Embossing Buddy. Using Versamark, stamp over all of the images again, add a sprinkling of the confetti flowers in the gap. Sprinkle with Clear embossing powder and heat set. 
  4. Use brayer, sponge brayer, or sponge to cover the panel in Dapper Denim ink. Then take a lightly damp cloth and rub the excess ink off the embossed areas.
  5. Stamp the sentiment from the Watercolor Wishes kit stamp set in Versamark on a piece of Vellum, heat emboss with Copper embossing powder, then cut down and dovetail one end. Stitch to the panel. 
  6. Adhere the finished panel to a Blushing Bride card base with dimensionals (or coasters if you have them :)  ).
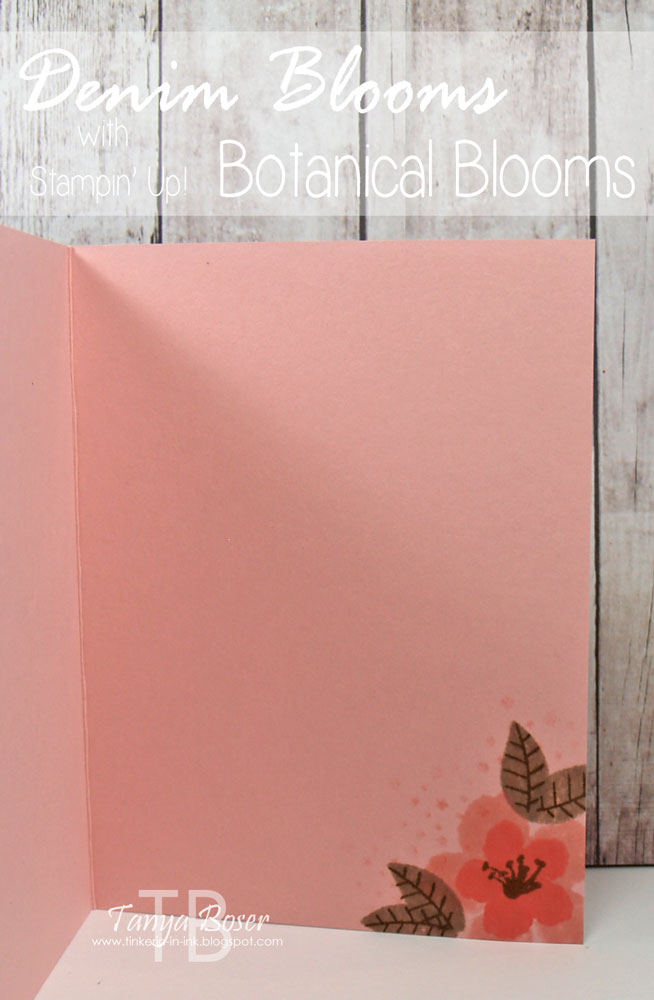
  7. Stamp the flower and leaves inside the card in the right lower corner. All done!
You can see the dimension here, and a little closer look at the flowers. Some of the Versamark stamping was not perfect, but it adds a little shadow and depth to the images, which I really love!

I stamped the big flower in Blushing Bride, then layered the smaller flower in Flirty Flamingo. and the stamen in Soft Suede. The leaves are Crumb Cake and Soft Suede. I added a few stamped off Blushing Bride flower confetti images to this also.

I am the last stop on this hop, but if you started somewhere in the middle, or you just want to go around again, head on over to Jessica William's blog! She is sure to knock you socks off!

http://thepapercaper.com.au/2016/08/01/src_bb

http://rubberredneck.typepad.com/rubber-redneck/2016/07/the-stamp-review-crew-hop-botanical-blooms.html

If you have seen something you need for your crafting life, just click the image in the supply list below and it will take you to my store! If you order less than $150, please use this month's Host Code, which can be found at the top of the sidebar on the right.

And be sure to check the box allowing me to contact you when you check out. I can't send you a thank you card if I don't know your address! And I promise to only send you happy mail, no junk mail :)

Product List

LinkWithin

Related Posts with Thumbnails