I have another swap to share with you, and they may have made it to the recipients by now :) I mailed them on Monday and they went from coast to coast :) I had fun using some of my favorite new things from this Annual catalog!
I am actually taking a staycation this week as I had use-or-lose vacation time that I had to use this week, so maybe I can get a bunch of stamping done! I mean, I have a ton of stuff from the new catalog that has not even seen ink yet! I would love to get enough stuff stamped to feed the ever hungry blog-monster for the next few weeks :) I do love having a blog, it gives me a place to share my projects, and hopefully gives my viewers some tips, tricks, and inspiration that you all can use to improve your crafting lives.
And in my quest to do more videos, here is one for this card!
Monochromatic cards are not something I do very often. I like a variety of color, but this one seems to have a good balance of color to white and metallics. And the layers and texture help :)
I don't think I need to go into all the details of how I created this card since there is a video, but please let me know below in the comments if the written directions are something you miss.
Here you can see the dimension on the top of the cupcake a little better.
And I don't think I will ever get tired of the vellum sentiment strips! By doing the heat embossed sentiment on a strip of vellum, I avoid warping the card base. If I was stamping and heat embossing on a watercolor card base, I wouldn't worry about it, but regular cardstock does tend to warp from the heat. I get picky about that kind of thing :)
If you have seen something you need for your crafting
life, just click the image in the supply list below and it will take you
to my store! If you order less than $150, please use this month's Host Code, which can be found at the top of the sidebar on the right.
And be sure to check the box allowing me to contact you when you
check out. I can't send you a thank you card if I don't know your
address! And I promise to only send you happy mail, no junk mail :)
It is mid-July and it is definitely time for bright sunshiney fruit cards! So here we go with one of the cards I made for a recent swap. I had not played with the Pineapple background stamp much yet and really felt the need to ink it up! So much so that I made a video for this card. Hopefully you enjoy yhe video :)
I am still fine-tuning my video making abilities, and I hope that they are getting better! At least they are getting shorter :) Please leave me some feedback, click like, and subscribe to see more papercrafting videos from me!
I am in love with pineapples right now. I am not kidding when I say that, between my hubby and I, we go through three fresh pineapples a week right now! I have gotten really good at waiting until they are so ripe, they actually have a coconut flavored undertone. YUM!!! I am going to go have a few bites of pineapple right now while I type this up :)
You will see in the video that I have cut my image into two parts so I can ink them separately.
There is a watercolor wash as the background of this card front, done in Peekaboo Peach.
Then the pineapple is inked up with Crushed Curry and thumped with a Soft Suede marker, stamped off once, spritzed with water, then stamped onto the watercolor panel. Then the same process is repeated for the top of the pineapple in Wild Wasabi and accented with Emerald Envy. Do the same on the right side of a 4"x5¼" panel of Whisper White as the card liner.
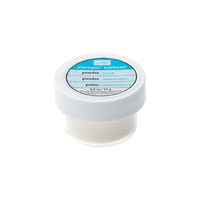
Apply Clear Wink of Stella all over the pineapple.
Stamp the thank you banner from Pop of Paradise in Archival Black ink on a scrap of Whisper White, then die cut with the Paradise Pop die from Dies by Dave
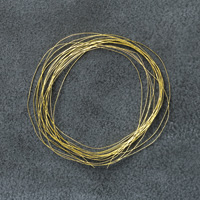
Apply dimensionals to the back of the banner, create a nest of gold thread, and stick to the back of the banner. Adhere to the cardfront over the middle of the pineapple.
Stitch around the edge of the watercolor panel.
Trim 4" square coasters to fit the back of the panel, adhere to card front. Adhere card liner to the inside. All done!
You can see the little bit of dimension the coasters give to the card front, and the lovely little banner!
I used a fun die set from Dies by Dave to cut out this banner, and there are so many great dies in this set, you are really going to want them yourself :)
Even on Whisper White the stamping off looks great! This technique gives the image more dimension.
If you have seen something you need for your crafting
life, just click the image in the supply list below and it will take you
to my store! If you order less than $150, please use this month's Host Code, which can be found at the top of the sidebar on the right.
And be sure to check the box allowing me to contact you when you
check out. I can't send you a thank you card if I don't know your
address! And I promise to only send you happy mail, no junk mail :)
Time for another Creative Crew Christmas card! This time the challenge is to create something with the This Christmas Specialty Designer Series Paper or choose 3 of the colors
in the DSP: basic black, cherry cobbler, garden green or very vanilla. And I missed the part of the challenge that was to use a fancy fold, oops!
This card started out as a 4"x5¼" panel of watercolor paper. I was then able to get 2 cards out of it by cutting it in half :)
The embossed vellum panel behind the watercolored image strip gives this a soft and elegant look with little effort. And if you don't have a sewing machine easily at hand, you could just put adhesive being the vellum where other things are covering it. Vellum is tricky that way, which is why I love to stitch it on. That way the stitching serves two purposes: securing the item, and it is pretty :)
Here are the steps to making this card:
Cut a watercolor piece to 5½"x8½, score in half at 4¼". This is the card base. Cut another piece of watercolor paper to 2"x5¼" (or 4"x5¼" if you are going to make 2 cards, then cut this in half when done with the watercoloring)
Stamp the holly branch all over the panel in Versamark, leaving a 1½" strip empty for the sentiment. Heat emboss with clear embossing powder.
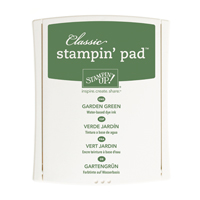
Use Aqua-painter and Garden Green ink to apply a wash, darker at the top and bottom, fading as you work toward the center. Be sure to leave that strip blank for the sentiment. When this is dry, use Cherry Cobbler ink to color the berries red.
Stamp the sentiment in Archival Black ink in the blank strip.
Apply dimensionals to the back of the watercolored panel, create a nest of gold thread and stick to the dimensionals. Set aside.
Cut a piece of vellum to4"x5¼", emboss with Softly Falling embossing folder. Stitch to the card front (make sure the card is open before you start stitching or you will have to improvise later :) )
Adhere the watercolor panel to the card front, mostly to the right side.
If you start to stitch the vellum to the closed card base by accident, then you can cover your goof by stamping the holly branch just under the stitch marks- ink the stamp with Garden Green, stamp off once, then spritz with water and stamp on the watercolor card base.
Then add Cherry Cobbler to the berries with an Aqua-painter.
Take a 2" strip of vellum, stamp the sentiment in Archival Black, sprinkle with Clear embossing powder, and heat emboss.
Then stitch over the previous stitch marks.
If you don't make the same mistake I did, then you can use the same steps as above, except no vellum and embossing :)
This card came together pretty quickly so it is perfect for making a whole bunch!
If you have seen something you need for your crafting
life, just click the image in the supply list below and it will take you
to my store! If you order less than $150, please use this month's Host Code, which can be found at the top of the sidebar on the right.
And be sure to check the box allowing me to contact you when you
check out. I can't send you a thank you card if I don't know your
address! And I promise to only send you happy mail, no junk mail :)