Showing posts with label watercolor. Show all posts

Tuesday, August 16, 2016

Creative Crew: Sympathy

Often times when we need a sympathy card, we are just not in a creative state of mind. For that reason, I like to have a stash of sympathy cards available at all times. And they are my biggest sellers at work. So when the Creative Crew Holiday Focus for August was Sympathy cards, I was all over that!

I had bought the Heartfelt Sympathy set this spring, I think, with the thought that it would be a marvelous set for all of those sympathy cards I should crank out. And I paired it with Gorgeous Grunge this time, which is a must-have set in my opinion :)  Here is how I made it:
  1. Cut a panel of watercolor paper to 4"x5¼". Create a 4¼"x5½" Soft Sky card base.
  2. Squeeze your Soft Sky and Peekaboo Peach ink pads to create a puddle of ink on the lids. Use your Aqua-painter to dilute the inks and watercolor a puddle of Soft Sky. Heat set, then repeat in a different but overlapping pattern with the Peekaboo Peach. Heat set again.
  3. Splash clean water on the panel, then dab the water off with a relatively clean cloth. This removes some of the ink in a spatter pattern. 
  4. Then either load your Aqua-painter with leftover diluted ink from the inkpad lids and spatter onto panel by tapping the brush over the watercolor paper, or use the fine spatter image from Gorgeous Grunge to apply some spatters. Dry again.
  5. Use Embossing Buddy over the water color panel, then test to see if any embossing powder sticks. If it sticks, brush off, then heat with heat tool and test again. 
  6. When the embossing powder no longer sticks, use the embossing buddy again, stamp the sentiment in Versamark ink, sprinkle with Copper embossing powder, and heat set. 
  7. Stitch around the panel with sewing machine and thread.
  8. Apply dimensionals, (or trimmed coasters if you have a big stash of them like I do), to the back of the watercolor panel and adhere to the front of the cardbase. 
  9. Stamp the second part of the sentiment in Soft Suede inside the card, then stamp the fine spatter image in Soft Sky and Peekaboo Peach from the right lower corner up towards the center. All Done!
 Soft Suede was about as close as I could get to the Copper embossing powder color for ink. Embossing inside the card on the cardbase tends to warp the card a bit, and I just did not want that for this card :)

What is your go-to stamp set for sympathy cards? And do you keep a stash of them?

If you have seen something you need for your crafting life, just click the image in the supply list below and it will take you to my store! If you order less than $150, please use this month's Host Code, which can be found at the top of the sidebar on the right.

And be sure to check the box allowing me to contact you when you check out. I can't send you a thank you card if I don't know your address! And I promise to only send you happy mail, no junk mail :)


Product List


Friday, July 8, 2016

Christmas Branches

Time for another Creative Crew Christmas card! This time the challenge is to create something with the This Christmas Specialty Designer Series Paper or choose 3 of the colors in the DSP: basic black, cherry cobbler, garden green or very vanilla. And I missed the part of the challenge that was to use a fancy fold, oops!


This card started out as a 4"x5¼" panel of watercolor paper. I was then able to get 2 cards out of it by cutting it in half :)

The embossed vellum panel behind the watercolored image strip gives this a soft and elegant look with little effort. And if you don't have a sewing machine easily at hand, you could just put adhesive being the vellum where other things are covering it. Vellum is tricky that way, which is why I love to stitch it on. That way the stitching serves two purposes: securing the item, and it is pretty :)

Here are the steps to making this card:
  • Cut a watercolor piece to 5½"x8½, score in half at 4¼". This is the card base. Cut another piece of watercolor paper to 2"x5¼" (or 4"x5¼" if you are going to make 2 cards, then cut this in half when done with the watercoloring)
  • Stamp the holly branch all over the panel in Versamark, leaving a 1½" strip empty for the sentiment. Heat emboss with clear embossing powder.  
  • Use Aqua-painter and Garden Green ink to apply a wash, darker at the top and bottom, fading as you work toward the center. Be sure to leave that strip blank for the sentiment. When this is dry, use Cherry Cobbler ink to color the berries red. 
  • Stamp the sentiment in Archival Black ink in the blank strip. 
  • Apply dimensionals to the back of the watercolored panel, create a nest of gold thread and stick to the dimensionals. Set aside. 
  • Cut a piece of vellum to4"x5¼", emboss with Softly Falling embossing folder. Stitch to the card front (make sure the card is open before you start stitching or you will have to improvise later :)  )
  • Adhere the watercolor panel to the card front, mostly to the right side. 
  •  If you start to stitch the vellum to the closed card base by accident, then you can cover your goof by stamping the holly branch just under the stitch marks- ink the stamp with Garden Green, stamp off once, then spritz with water and stamp on the watercolor card base. 
  • Then add Cherry Cobbler to the berries with an Aqua-painter. 
  • Take a 2" strip of vellum, stamp the sentiment in Archival Black, sprinkle with Clear embossing powder, and heat emboss. 
  • Then stitch over the previous stitch marks.
If you don't make the same mistake I did, then you can use the same steps as above, except no vellum and embossing :)

This card came together pretty quickly so it is perfect for making a whole bunch!

If you have seen something you need for your crafting life, just click the image in the supply list below and it will take you to my store! If you order less than $150, please use this month's Host Code, which can be found at the top of the sidebar on the right.

And be sure to check the box allowing me to contact you when you check out. I can't send you a thank you card if I don't know your address! And I promise to only send you happy mail, no junk mail :)

Product List

Wednesday, June 15, 2016

Honey and Gold

I was working on some posts for my blog and found this post as a draft from months ago! Wow! I think it is time for this project to come out and play :) Thankfully this stamp set carried over into the new Annual Catalog!

I actually made this card for a swap I take part in about quarterly, and I made a couple versions of it.


Ok, bear with me here. I am going to try to remember all the details of how I made this card :)
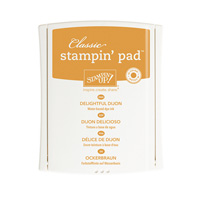
  • Cut a panel of watercolor paper to 3½"x4¾", and a piece of Delightful Dijon to 3½"x5". Stamp the flower cluster in Versamark and heat emboss with Gold embossing powder. 
  • Use an Aqua-painter to color the flowers, dry (air or heat tool). 
  • Go over the leaves and stamens with the Gold Wink of Stella.  
  • Add some watery Delightful Dijon to the background with the Aqua-painter, dry. 
  • Spatter with a more intense Delightful Dijon with the Aqua-painter. 
  • Stitch the watercolor panel tot eh Delightful Dijon mat, then adhere to the Thick Whisper White card base.
This version has much less going on in the background, but there are some dots stamped in the background instead of being spattered on.

Which one do you like better?

If you have seen something you need for your crafting life, just click the image in the supply list below and it will take you to my store! If you order less than $150, please use this month's Host Code, which can be found at the top of the sidebar on the right.

And be sure to check the box allowing me to contact you when you check out. I can't send you a thank you card if I don't know your address! And I promise to only send you happy mail, no junk mail :)


Product List

Friday, February 19, 2016

Strawberries and Bricks

Aren't these strawberries sweet?! I used the Market Fresh and Endless Thanks stamp sets on this card.  Here is what I had to say about modifying the sentiment in an earlier post:

You  will also notice that the sentiment on the strawberry image is not the one on the stamp. Lots of people have commented on the possible interpretations of "Just Ripe for You", so I decided to carefully cut that part of the stamp out with my Snips to start the hole, and my rubber scissor to finish the job. And guess what? There are loads of sentiments that fit in the banner! Anything from And Many More...and Teeny Tiny Wishes, one from Watercolor Wings, several from Sprinkles of Life, and so many more!
 I bet there are even more sentiments that would fit in there! And on top of that, Dies by Dave has a die set for Market Fresh :) And I used it for this card!


This card ended up in a stack of 24 thank you cards I gave to a mommy-to-be at her baby shower. She and her mother loved them all, and helped me destash. She was worried that she has wiped out my stock. Yeah, no. I still have more than that in my stash!! I better get to selling those cards, and sending out thank you cards!
OK, here is how I made this card:
  • Cut a piece of Thick Whisper white to 5"x6", score in half, so at 3" on the 6" side. Put the card front into the Brick Wall embossing folder and run through your die cutting machine. 
  • Either cut a Blushing Bride banner to fit, or use a leftover banner from the Chalk It Up To Love Paper Pumpkin kit. Lay the polka dot mask from Happy Patterns set over the banner and color the dots in with a Blushing Bride marker. Outline with Signo white gel pen. Adhere to the carfront.
  • Take a piece of watercolor paper that is at least 2½" square, and stamp the strawberry image and your chosen sentiment in a waterproof ink. Our Archival Basic Black is fantastic by the way! Bold black and waterproof. Color in with an Aquapainter and ink squeezed onto the lids of Wild Wasabi, Garden Green, Cherry Cobbler, and Crumb Cake inkpads. Fussy cut, or die cut with the Dies by Dave matching dies. 
  • Stick a bunch of dimensionals on the back of the strawberries and peel the backing off, then set aside. Create a tangle of Gold thread adn stick to the exposed dimensionals, arranging as you want them. Then stick this whole thing to the banner.
  • Inside the card, stamp the strawberries in the corner of the panel in Crumb Cake. 
  • For the envelope, take a piece of Blushing Bride DSP and cut to the correct size and follow the directions on the Envelope punch board. I have been using retired DSP to make all kinds of envelopes, helping to destash those too! 
  • All done!
As always, if you have seen something you need for your crafting life, just click the image in the supply list below and it will take you to my store! If your order is less than $150, please use this month's Host Code: PCUN2KHD
And be sure to check the box letting me contact you, as I can't send you a thank you card if I can't see your address :)  I promise, I will only send you happy mail, no junk mail!

Product List

LinkWithin

Related Posts with Thumbnails