Welcome! We are celebrating one of the biggest symbols of summer, the butterfly with
Papillon Potpourri! This set has been around for awhile, but it has a timeless appeal and lots of styles of butterflies to choose from. I am certain that if you don't already own this set, by the time you finish hopping, it will be on your wishlist for your next order :)
For those who are new to the Stamp Review Crew, here is a little background. We are an international group of Stampin' Up! demonstrators that gets together on the first and third Mondays of every month to do a blog hop. Each hop features a single stamp set to give you loads of inspiration for that set! The hops are archived at the
Stamp Review Crew blog, and you will be able to click through each hop at any time, going directly to the posts for that hop whenever you want! And you can click on the banner of this post to go to the
master blog roll for this hop also.
If you are following along in order, then you have arrived from Dawn Tidd's blog where she did an amazing job with this stamp set, I am quite sure :)
First up is this sweet set of little thank you cards using the new In-Colors. I just love how clean and true to color these inks remain when you watercolor with them!
- I just cut some pieces of watercolor paper to size, then used my Aquapainter to lay down a wash of the color I wanted to feature!
- After the wash dried, I stamped on the sentiment.
- The butterflies were stamped in the color ink shown on vellum, then heat embossed with clear embossing powder, then punched out with the Elegant Butterfly punch. There is a plain white butterfly behind each of the vellum ones so that they really pop on the watercolor wash.
- See how I snuck in some of that gorgeous Ruched ribbon?! LOVE, I tell you!
- Or course, me being me, I had to stitch around each of the watercolor panels, then I adhered them down to the Thick Whisper White card bases.
The little butterflies were made the same way as the ones one the outside, but punched out with the Bitty Butterfly punch. I folded them in half, then used a mini glue dot to stick them to the card base.
Next up is another watercolor piece. This time I used some resist technique.
- I stamped the butterflies all over a panel of watercolor paper I had taped down with painters tape, then heat embossed with Clear embossing powder.
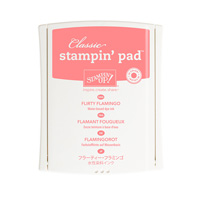
- Next I sponged on some Flirty Flamingo, Peekaboo Peach, and Crushed Curry. Then I spritzed the panel with water, allowing the colors to soften and blend. Then I let it dry. Ok, I dried it with my heat tool, who am I kidding!
- Next I spattered some clean water on the panel, let it sit for a few seconds, then dabbed it off with a clean cloth. This removed some of the ink in a spatter pattern.
- Then I took a 1½" strip of vellum, stamped the sentiment in Versamark, and heat embossed with Copper embossing powder.
- Then I stitched the ends of the vellum strip to the butterfly panel. Then adhered the whole thing to a Flirty Flamingo card base with dimensionals.
- Stamp a few more butterflies in Flirty Flamingo, stamped off once, inside and the card is complete!
Isn't that a fun birthday card?!
I have one more for you, then I better stop! This one uses some of the Playful Palette DSP stack.
- Cut a piece of vellum to 4"x5¼". Cut a piece of Mint Macaron to 3¾"x5". Emboss the Mint panel with the Fluttering embossing folder. Stitch these two pieces together, the Mint on top. Adhere to a Thick Whisper White card base with Tear & Tape, SNAIL, or Fast Fuse.
- Cut a 1½"x4" strip from the Playful Palette DSP, then cut a dovetail into one end. Adhere to the Mint panel.
- Take a doily and die cut a 3" circle from the center.
- Stamp a large butterfly with Archival Black ink on a piece of watercolor paper, use Aqua-painter to color butterfly with Flirty Flamingo and Peekaboo Peach. when this is dry, add Clear Wink of Stella to the wings. Die cut the image with an approximately 2" circle die, or a 2" circle punch.
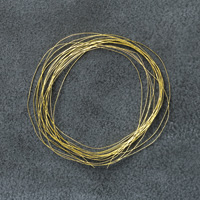
- Add some dimensionals to the back of the circle, make a nest of gold thread, and stick it to the back of the circle, fine-tuning the thread placement to get it the way you want. Then adhere the circle to the doily. Add dimensionals to the back of the doily and adhere to the DSP banner on the Mint panel.
- Stamp two banners in Crumb Cake on a scrap of Kraft cardstock, punch out with Duet Banner punch, then add sentiments, and trim one of the banners to just the center portion of the banner. Adhere to the full banner piece with dimensionals, add a couple more dimensionals to the back of the full banner, then adhere to the card front.

- Inside, I stamped some more butterflies, then used a Blender Pen to add color, and went over that with the Clear Wink of Stella. All Done!
So what do you think? Do you need to dig this set out and play with it again yet? :) You can see a list of the supplies I used at the bottom of this post.
That's it for me, now it is time to go see what glorious projects Jessica Williams has created!
As always, if you have seen something you need for your crafting
life, just click the image in the supply list below and it will take you
to my store! If you order less than $150, please use this month's Host Code, which can be found at the top of the sidebar on the right.
And be sure to check the box allowing me to contact you when you
check out. I can't send you a thank you card if I don't know your
address! And I promise to only send you happy mail, no junk mail :)
Product List