Wednesday, October 6, 2010

HUGE Clearance Rack Savings!

Now, from October 5-18, we're adding over two hundred more discontinued items--some at up to 80 percent off--to help us make room in the Distribution Center for new products!

This is the announcement I just got from Stampin Up! You have to go check it out! Just click on the Shop Now button to the right to get to my demonstrator website to check it out! Find the shop now button in the upper right on my demo website. You want to go through a demo's site to get the best prices :)  We all love a bargain and SU is here to deliver :)

Cupcakes for a Birthday, Again!


More birthday stuff! I still need to build up my stash ;) Cupcakes are always good for birthdays don't you think?


Here is the little gift set I put together. There is a little treat holder and a holder for a single tea light, you know, so they can blow out the candle ;)


Let's start with the card. It's all about the layers here, just like with a good birthday cake, lol! I used several punches to create the embellishments for this card. I love how the main image looks with all the punches behind it!


In this side view you can get a better idea of how much it really sticks out! I think I may have gone a little over board. This is definitely a hand deliver card. And you get a peek at the inside on this pic too. Can you see the Shimmer Paint on the raised part of the embossing? I used a sponge dauber to apply it. Then I used a blender pen to apply some to the tiny cupcake frosting, too.


The inside has lots of cupcakes! I'm getting hungry just looking at all those cupcakes with their pink frosting and cherries! They must be chocolate cherries since they are all brown :) I used several stamp sets on this card, I will try harder to keep it to one or two in the future.
  • Stamps: On a Pedestal, Itty Bitty Bits, Tiny Tags, Afterthoughts, Birthday Bliss
  • Paper: Chocolate Chip, Real Red, Blushing Bride, Naturals White
  • Ink: Chocolate Chip, Real Red, Blushing Bride
  • Other: Big Shot with Tasteful Trim die and Vintage Wallpaper embossing folder, Frost White Shimmer Paint, Sponge Dauber, Blender pen, 2-1/2" Circle Punch, 2-3/8" Scallop Circle punch, Designer Label punch, Wide Oval punch, Scallop Circle punch, 1-3/8" Circle punch, Rhinestone Basic Jewels, Stampin' Dimensionals, Corner Rounder punch

I had a brilliant idea, at least to me! Why not package tea lights like a candy treat? Then you can give them away a little easier since you won't be making the box too. This was pretty fast and easy. I used one of the tags from the Two Tags die, scored at 2" and 2-5/8" up from the bottom.  Decorated as shown, then I punched a hole through the tops of both flaps to be tied shut with some linen thread, hemp twine, 1/8" taffeta ribbon, or crochet thread. I did put a little bit of Dotto on the back flap to help prevent the tea light from sliding out.


Here you can see how the tea light sits inside. Pretty brilliant huh! The treat holder is done in a very similar fashion and I got that idea from Mary Brown. Thank you Mary for being an inspiration!

Tuesday, October 5, 2010

Cake on a Pedestal


A couple weeks ago I won a prize for participating in Holly Krautkremer's Color Round Up color challenge. Well, I got my prize in the mail on Saturday (several pieces of Early Espresso, Pumpkin Pie, and Daffodil Delight card stock, Shimmer card stock, Pumpkin Pie ribbon, hemp twine, and a couple Early Espresso buttons) and this is what I made with part of it! I have been on a birthday kick this week, maybe because I realized how few I have stashed for last minute use, lol! The main image is stamped on shimmer paper which gives the card some extra glamor :) The card base is Naturals White and the front was embossed. And that pedestal just screamed for rhinestones ;)


I was trying to keep this fairly flat so it would be postal service friendly. I think the bow may be the lumpiest part.

This is the inside of the card. I have to admit, I like decorating the inside. I mean, we spend a ton of time on the front, the inside should be just as good, right? Have you ever had someone look at a card in your stash  and have a look of disappointment when they open it and there is nothing inside? Well, that is not happening to me any more!

  • Stamps: On a Pedestal, Whimsical Words, Well Scripted
  • Paper: Naturals White, Shimmer, Pumpkin Pie, Daffodil Delight
  • Ink: Early Espresso, Pumpkin Pie, Daffodil Delight
  • Other: Big Shot with Tasteful Trim die and Vintage Wallpaper embossing folder, Rhinestones Basic Jewels, Scallop Border punch, Pumpkin Pie 1/4" grosgrain ribbon

Here is a straight on view of the front of the card. Let me know what you think!

Monday, October 4, 2010

Autumn Birthday


I was inspired by Lisa Young's card, but her's was much better! In fact, hers is so much better, I'm not even going to link to it so that you will still like mine, lol! I just didn't have the time to stamp and cut out a half dozen leaves because I needed to send out 3 of these to family members for their birthdays. Did I mention that September is a very busy month?! I have 2 cards I need to get out in the mail for last  week!
For these cards, I stamped on the Cajun Craze paper, then ran embossed it with Finial Press, then used a sponge dauber to apply Champagne Mist Shimmer Paint to the raised parts. I also stamped leaves on the Daffodil Delight paper before punching/die cutting those pieces. They got a little Shimmer paint also. I love that stuff, sigh.... I really am not happy with theses cards, but I was on a deadline, so they will have to do. Not every card card be a masterpiece! Like mine are anyway, lol! Roll eyes....
  • Stamps: Autumn Splendor, Occasional Quotes
  • Paper: Daffodil Delight, Cajun Craze, Early Espresso
  • Ink: Early Espresso, Daffodil Delight
  • Other: Big Shot with Leaves #2 die and Finial Press embossing Folder, Designer Label punch, Wide Oval punch, Signo white gel pen, Champagne Mist Shimmer Paint, Sponge Dauber, Chocolate Chip satin ribbon (retired), Antique Brads, Stampin' Dimensionals, SNAIL
 And a full picture of the card. What do you think? Colors too bright, not enough details, not well balanced?

Sunday, October 3, 2010

Acorn Notepad

This is another of the Stamp Club projects from September. It is a covered notepad. I love our little print shop in town. They have a shopping cart right inside their door that they put little notepads for sale in. They make them out of their scraps and sell them for 10 cents a piece. They are really good papers too, like heavy textured card stock or thick brochure paper. I now have quite a stash of these little things! I better start making more of them, lol!
After making all of my kits for club, I realized this would have been cuter if the acorn had been stamped on our wood sheets instead of paper. But it was too late at that point... I did make some later with the wood sheets, but I didn't get a photo yet. Did you know that the wood sheets are thin enough that you can use our punches on it?! They are also backed with paper for stability and ease of adhering.
And did you notice how well the Cherry Cobble Seam Binding ribbon coordinates with the Riding Hood Red paper? Love it!
  • Stamps: Autumn Splendor
  • Paper: Riding Hood Red, Chocolate Chip, Naturals Ivory
  • Ink: Riding Hood Red, Pear Pizzazz, More Mustard, Chocolate Chip
  • Other: Cherry Cobbler 1/2" Seam Binding ribbon, 1-1/4" Circle punch, 1-3/8" Circle punch, Stampin' Dimensionals, Snail (to adhere the ribbon)
To make the cover for the note pad, I measured the notepad, doubled the width and added 1/4". For example, the notepads I used this time were 3-1/2"x4-1/4", so I cut the paper for the cover as 7-1/4"x4-1/4".
Then I scored it at 3-1/2" and 3-3/4". Very simple, see! Now you can go make your own :)

Saturday, October 2, 2010

Boys of Fall page


There is a new country music song out called "The Boys of Fall" all about small town high school football teams. I love it! Could be because I grew up in a small town, and all of my boys have been or are in football right now. It highlights all the things that I think high school sports should be about- teamwork, fair play, physical activity, passion for something physical (so maybe they will continue exercising as adults!), being a part of the community....not a career.  Ok, off my soapbox!
These are photos of my son and his team, but I got a couple shots of his friends in there too :) This is the page I came up with for Stamp Club on 9/23/10. Why has it taken me so long to post it? Well, I had to work, then it was my birthday and I hadn't taken any pictures of this yet...and you heard what I did for my birthday lol! Now I finally have a day off again, so I should be back on track with daily posts!
The fun borders on this page were cut with the Tasteful Trims XL die. As soon as I saw that die, I knew I had to have it! I use it all the time now! And isn't it cool how the Designer Label and the Curly Label punches layer?! I was pleasantly surprised there, lol. I also discovered that I need to order more Marina Mist 12x12 paper- I only had enough for half of the ladies at club to use it! So for the other half, I reversed the Old Olive and the Marina Mist. The little tabs beside the pictures are the Designer Label punch punching out only half of it. Now, on to the supply list!
  • Stamps: Day of Gratitude
  • Paper: Marina Mist, Old Olive, Early Espresso, Autumn Spice Specialty DSP
  • Ink: Old Old, Marina Mist, Early Espresso
  • Other: Big Shot with Tasteful Trims die, Designer Label punch, Curly Label punch, Large Oval punch, gold brads, Signo white gel pen, Stampin' Dimensionals
 Here is another look at the trim and the layered punches. I love how the colors of this page mimic the vivid colors on the football field, green grass and autumn skies! Oh, and my son is #41 in these pictures :)

Tuesday, September 28, 2010

Justin's Birthday Card and a Trip to the Park


It was absolutely gorgeous out today, and I never made it to the park yesterday. That half a glass of margarita at lunch with Cathy yesterday did me in! I was all sleepy and fuzzy the rest of the day. What can I say, I'm a light weight when it comes to alcohol, lol!
Anywho! I thought I would share a few pictures from the park today. I went by myself and spent 2 hours walking the trails , taking pictures, and eating my lunch. I will definitely have to do this again soon! I will share more pictures from the park after the card in this post :)

I made this card a week or so ago. I made it for my youngest brother-in-law, Justin. He was 7 when my hubby and I started dating :) I used the Color Round Up for my color combo, and the layout just evolved. I had a piece of Early Espresso in my scrap file that had already been embossed with an inked up texture plate and I used my Color Spritzer on the main image too. I had to make myself not use the Shimmer Paint, it's just not guy card material I guess... But the new Tasteful Trim die sure is handy! The large scallops and the rick-rack trim are from that die.


This is the lower corner of the inside of the card. I used marker to ink it up and give it the multicolor look.
  • Stamps: Autumn Days, Woodgrain BG
  • Paper: Naturals White, Poppy Parade, Old Olive, Early Espresso
  • Ink: Naturals White, Poppy Parade, Old Olive, Early Espresso
  • Other: Big Shot with Tasteful Trim die and wood grain texture plate, Large Oval punch, Modern Label punch, Word Window punch, Signo white gel pen, Stampin' Dimensionals, Color Spritzer tool, distressing tool from Cutter kit
Ok, now for more pictures from the park. I used to take the kids to Lake Bemidji State Park every fall and take pictures of them in the leaves and stuff. It is always gorgeous there, no matter what the season. Well, the kids aren't as easy to catch anymore, what with 3 of them being adults and the 4th is in 8th grade and in multiple activities, so I went by myself, and I still enjoyed every minute of it!


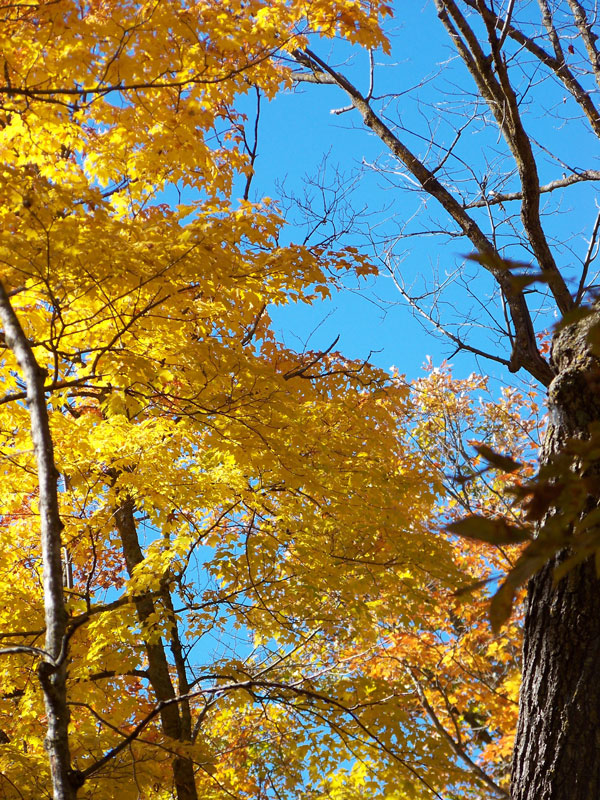
The sugar maples are just starting to turn that amazing golden color. In another week, they will be completely turned and the ground will be covered in this carpet of leaves that is so fun to walk through. The air was just as clean as could be, the sun was shining dappling the ground....


Still lots of green in some of the leaves.


There was a poplar tree growing sideways for about 30 feet, and there were leaves falling on the trunk. It really caught my eye and I took several pictures of it. There was a bench nearby that I sat on for a few minutes just soaking in the peacefulness of the day.


A view of the sky through the trees....


Looking out over Lake Bemidji.


Entering my driveway. Wow, I never really thought about how tall the trees are at my house. They must be close to 70 feet tall!


A red oak in my yard.Ok, I better stop. I took lots of pictures today, lol! I hope you enjoy them!

LinkWithin

Related Posts with Thumbnails