Thursday, January 31, 2019

Kindred Stamps: Electrifying! and Day of the Dead Birthdays


Hello friends! Today I am using two sets from Kindred Stamps to make some vibrant and masculine birthday cards using watercolor as a main component. Watercolor and I are old friends 😁


This first card is made using the Day of the Dead stamp set with this adorable boy and his dog. I was going for a night scene with a marigold bridge.

The background here was all inked on one panel of watercolor paper in Chipped Sapphire, Blueprint Sketch, and Wild Honey Distress Inks. It was then liberally spritzed with Pearlized water and dried with my heat tool.


The floral embossing is a die from the Hero Arts April 2018 kit, and I used a silicone mat and the embossing sandwich.

Then I used a stitched edge die to cut the two colors apart. The yellow is popped up with my favorite dimension method, some coasters! They are thinner than most foam dimensionals, you can use whatever adhesive you have handy, it die cuts like a dream, and it is 100% recyclable! And cheap. OK, off that soapbox. 😊

The sentiment is gold heat embossed on white cardstock that is spritzed with Pearlized water also.
Copics were used to color the boy and the dog. I actually used the same colors for the boy's hair and the dog's fur!


Inside, I stamped a couple of the banners, then just a little water, watercolored the banners with the same inks as the cardfront. I used #110 white cardstock for the cardbase, so it could handle it.

I also used a Sakura Stardust Jelly Roll pen to add some sparkle to the banners.


For my second card, I am using the Electrifying! stamp set. I wanted to focus on the car this time.

I started the background with a panel of watercolor paper (140lb Canson XL) cut to 4"x5¼". I sponged on Grey Granite ink and spritzed with water, then dried with my heat tool.

After treating the panel with my anti-static embossing buddy, I stamped the cars in Versafine Onyx Black ink and clear heat embossed them.

Then it was time to watercolor those cars! Yes, right over the top of the color in the background. I used Coastal Cabana, Poppy Parade, and Blueberry Bushel inks squeezed into the ink pad lids and picked up with a wet watercolor brush.

I used Black Soot Distress Ink to color the tires. It only takes a smidge of that ink, by the way!


The chrome is all painted with Pewter Perfect Pearls. I added a smidge of the Perfect Pearls to a palette and added a double portion of water to create a paint. Then I just used my watercolor brush to paint it on.
I made a very short video showing the shimmer here:


Now go, make your own vibrant masculine cards!

Wednesday, January 23, 2019

Kindred Stamps Release: Science Geeks


It is Kindred Stamps Release week, and there is so much awesomeness to share!! I was lucky enough to get to play with Science Geeks. These are my people. I am such a nerd!


As soon as I got this set, I had to color the ladies. They are totally outnumbered, but they can certainly hold their own! 😉


The fellas were just as fun to color. Copics are now my preferred coloring medium for these types of images. And the more I use them, the faster I get at picking out colors!


Since I already had this super-nerd colored and cut out, this card came together in a flash. I used the Spaceship Panels stencil with some light grey ink on light grey paper. Stamped the sentiment in Versafine Onyx Black ink. Popped super-nerd up in the center, and done!


And that sentiment! So clever. All my nerdy friends will love it too.


This time it is the Swirls stencil that gets to play. I inked the Soft Granite ink first, then rotated the stencil and used Balmy Blue and Highland Heather inks.


The panel was spritzed with Pearlized water and dried with my heat tool. I stitched around the edge with my sewing machine. Then stamped and clear heat embossed the sentiment on some light grey cardstock, and adhered to the front of the card.


I had to do a card with all those brilliant ladies. The background is embossed with an embossing folder from my stash. And the ladies are standing on a piece of white cardstock sponged in Poppy Parade and Flirty Flamingo, then spritzed with Pearlized water and dried with my heat tool.


I am rather pleased with the coloring of the hair on these. Still a skill I am working on!

That's all I have right now. But check this out:

The entire Kindred Stamps January release will be available Friday, January 25th at 8am PST/11am EST. Be sure to check out the Kindred Stamps blog on Friday for the full product release as well as the complete line up of all the Kindred Stamps Design Team projects from release week! If you visit and comment on all of the designers' blogs this week, you could win $15 in Kindred Stamps shop credit! So join the Fan Club and release event, show the design team some love, and get ready to empty those wallets this Friday!

Sunday, January 20, 2019

Stamp Review Crew: Forever Lovely

https://stampreviewcrew.blogspot.com/2018/11/first-frost.html
Florals are not really my go-to stamp sets, but sometimes they are just what is needed. And being in the middle of a frigid Minnesota, it is nice to think of flowers. Valentine's Day is approaching too. So, Forever Lovely is a welcome change of season!
There is, of course, a coordinating die set with some really awesome features that work just as well without the stamps.

If you are new to the Stamp Review Crew, we are a group of Stampin' Up! demos from around the world, and we chose a different stamp set to feature every first and third Monday of the month.

If you are following along in order, then you have just arrived from Lauren Alarid's blog. Stunning!

I got inspired this time! I am so glad that the ideas were flowing for once, as I have been struggling a little lately.

This is a quickly stamped patterned background is soft colors, Lemon Lime Twist and Powder Pink.  It was really easy to line up the greenery stamp around the stamped flowers. Even if you are off a little bit, they still look great!


There are a bunch of die cut flowers and greenery here. I also took the floral corner detail die and cut once, then flipped it and cut again to create a little rectangle. It was surprisingly easy too!


Inside got floral borders top and bottom with a sentiment from the same set.


Next up is some Buffalo Check with watercolor. Lovely Lipstick and Powder Pink this time. And the Lovely Lipstick foil cardstock (a SAB item) gets to play as the heart behind the sentiment.

All kinds of dies used, and I will link them all below. As I always say, use it if you've got it!

There is vellum behind the floral peek through dies. ANd Copper heat embossed sentiment on sponged and spritzed die cut banner.

I wanted spatters on the inside, but I wanted them controlled. So I dug through my stamps adn found some in the Magical Mermaid and the Timeless Textures sets.

The sentiment is from another SAB set, Part of My Story.

Last up is a fun square card. I used a wreath builder template to create the radiating rainbow of hearts.


The center heart is sponged in Poppy Parade and Mango Melody, then die cut. Then the sentiment wast white heat embossed, and a vellum heat was adhered behind it. I also used layers of die cut coasters to add dimension behind the hearts.

Sentiment and more hearts, all from the Forever Lovely stamp set.

There we have it! All of my cards were created in one 2 hour session 😁

Next up is Jay Soriano with his amazingly creative mind!

https://mitosustampin.blogspot.com/2019/01/stamp-review-crew-forever-lovely.html

https://craftylittlepeach.blogspot.com/2019/01/the-stamp-review-crew-forever-lovely.html

Monday, January 14, 2019

Kindred Stamps: Electrifying!


Hello friends! Tanya here with a quick and easy Valentine idea. I combined the Swirl Stencil with the Electrifying! stamp set to whip these up.


First the hearts were die cut. Then the Swirls were sponged on with Lovely Lipstick ink. Then the sentiment was stamped in black ink.


Then this sassy lady was colored with Copics. Do you love the pink jacket?!


The same process here, but this time I got some fingerprints and smudges in the swirls. So, I sponged lightly over the whole thing! I think I still like it.


And coloring both of these characters was quick. I must be getting better (read faster) at picking colors, ha!
A person could really create a large pile of these pretty quickly. The sentiments in this set are perfect!

Monday, January 7, 2019

Kindred Stamps: Day of the Dead Sugar Skulls


I am so happy to be able to join the Design Team for a second term, and hope to bring you many fabulous ideas to inspire your own creativity!

This time I get to play with the Day of the Dead stamp set. I realize it is not the season, but really. Sugar skulls are beautiful all the time! I couldn't resist creating a background showcasing those skulls.


I chose 4 colors of Copic markers and alternated the parts they colored on each skull. Then I decided the background needed to be a light gray, so I took N0 and N1and colored it.

Then I just had to add a bit of sparkle to the sugar skulls, so I used Clear Wink of Stella over all of them!

The sentiment is white heat embossed on black cardstock, and backed with some silver glitter paper.


Inside, the sugar skull is simply stamped in Smoky Slate ink with a sentiment from the set underneath in Versafine Onyx Black.

I am going to get a bit deep here, but I believe that we all need to come to terms with death and mortality, of those around us and our own. By reminding ourselves that it is an inevitable part of life, and not something to fear, maybe we can learn to help our loved ones through their ends with as much peace, and as much joy, as possible. Yes, that is the nurse in me. Death comes to us all. Let us celebrate the lives already lived, remembering the ones that have passed with more joy than heaviness. AND to value our elders, their amazing stories, and experiences.

Now, go create some of your own stories! (and creations) 😉

Sunday, January 6, 2019

Stamp Review Crew: Fabulous Flamingo

https://stampreviewcrew.blogspot.com/2018/11/first-frost.html
I know, I know. It's the middle of winter! Why flamingos?! Well, because we wanted to, darn it! 😁 And our Southern Hemisphere crew members deserve to create stuff appropriate to their current season too. And I can dream of warmer climes while our local weather is anything but warm. So Fabulous Flamingo, here we come!

https://www.stampinup.com/ecweb/product/143758/fabulous-flamingo-photopolymer-stamp-set?dbwsdemoid=2010774


For the newbies:
What is the Stamp Review Crew, you ask? We are an international group of Stampin' Up! demonstrators that gets together to do a blog hop on the first and third (and sometimes on a fifth) Monday of each month. For each hop we chose a single stamp set for us all to use, and then we let our creativity loose! We have a blog with all of the hops archived, so you can hop through any of the hops any time. Click here to go to the blog to see all of the hops! To go to the specific post for this hop, click here, or on the banner above.

If you are following along in order, then you have just arrived from Heidi Baks and her amazing creations!


I had this thought in my head for a framed flamingo on an action wobbler that I just could not let go. So here it is!!

I envisioned a salmon-y pink for this flamingo, I used Grapefruit Grove with Flirty Flamingo, and it was perfection!

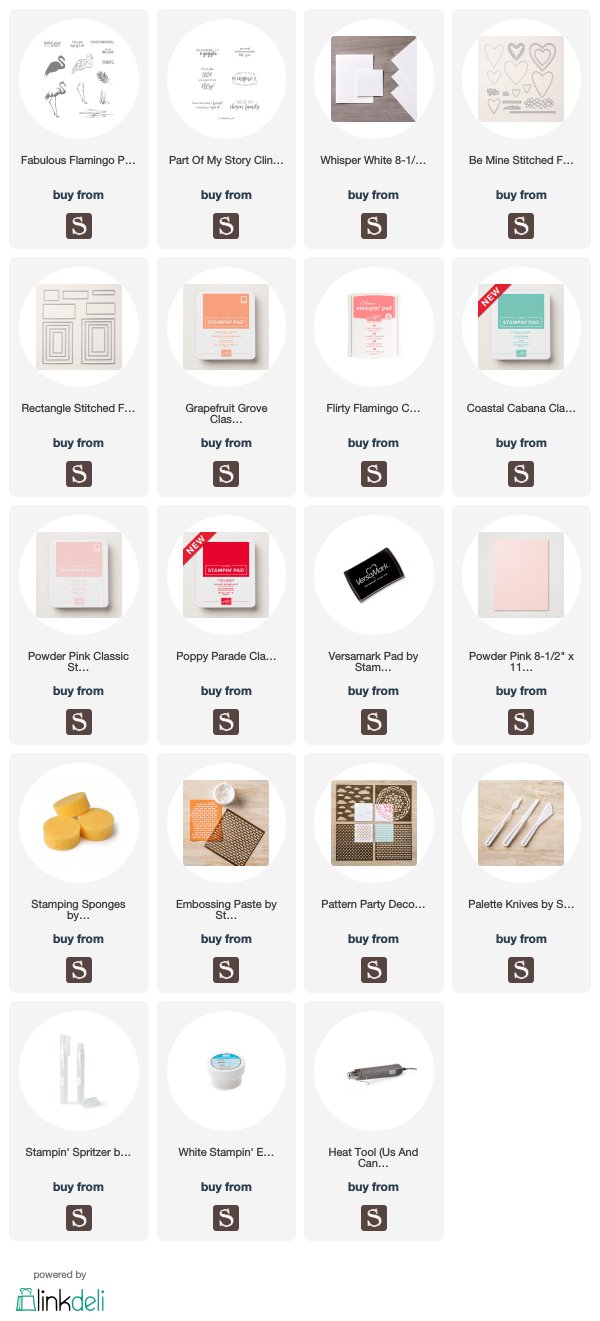
Of course, I had to get the  Rectangle Stitched framelits, so I created a frame with the 2nd and 3rd largest dies.


Behind the flamingo is a background sponged in Coastal Cabana, then the legs stamped in Flirty Flamingo dabbed with black ink.

Texture was added with Embossing Paste applied over it using a Pattern Party mask.

And the flamingo body was fussy cut so it could be added with an Action Wobbler. 


The sentiment strip is some Thick Whisper White sponged with Grapefruit Grove, spritzed with Pearlized water, and cut with a Rectangle Stitched framelit.

Inside was lightly sponged with Grapefruit Grove, and the sentiment was added.


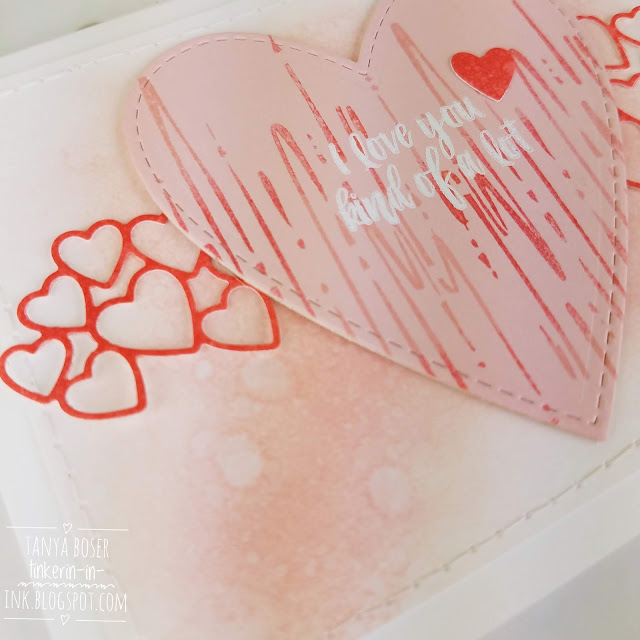
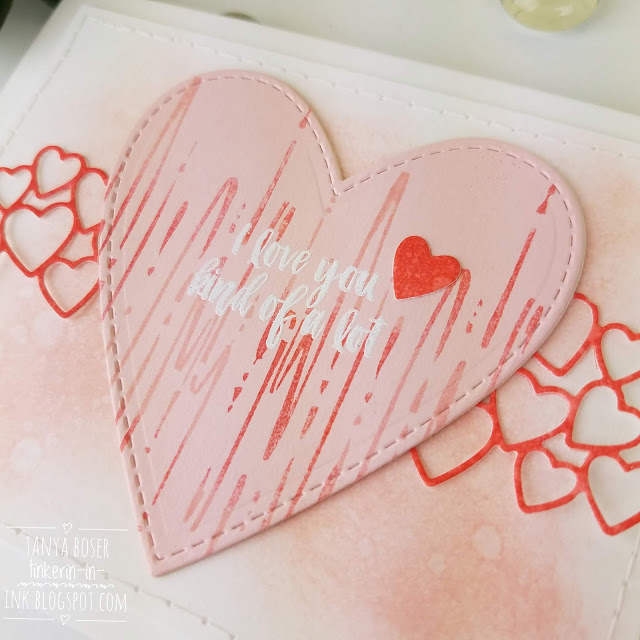
Then I got to thinking that the water image would be a great vertical repeating pattern. And then thought it looked like an abstract representation of a cardiac rhythm.

So, it was inked with Powder Pink, dabbed some Poppy Parade on the inked stamp with a sponge, and stamped onto a piece of Powder Pink cardstock. A bunch of times. Alternating the Poppy Parade sponging between the center and the ends.

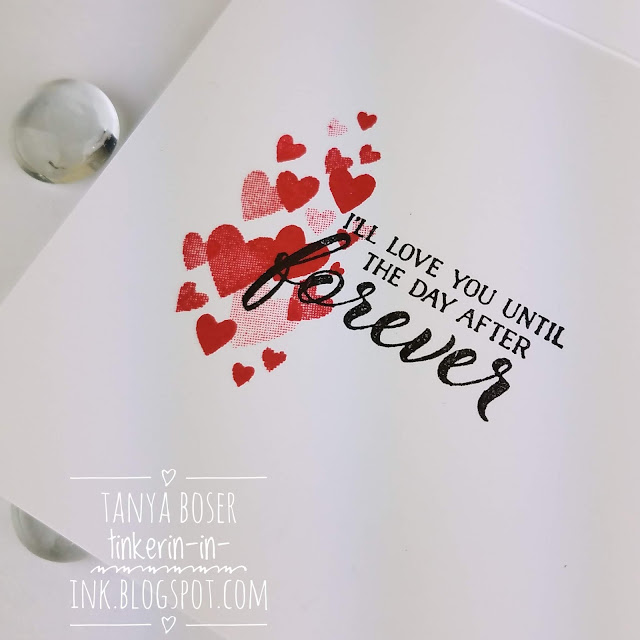
Then I needed to play with some of my new goodies, and the Be Mine Stitched framelits were just what the doctor ordered!  😉

The sentiment is white heat embossed on the die cut heart.

The background panel is sponged with Powder Pink and spritzed with Pearlized water, and for-real stitched.

The clusters of hearts started as Thick white cardstock sponged with Poppy Parade and then die cut. The fall out hearts are put to work also.

Inside, I stamped the water image the same way as on the heart, and added this amazing sentiment from the Sale-A-Bration set, Part of My Story.

There is another fall out heart put to use here. I have a bunch of them to use in future projects!

The ideas for this set just started flowing, and I hope to get some more of them put to paper real soon. Until then:

Next up is Stesha Bloodhart. I am sure she will have some stunners!


LinkWithin

Related Posts with Thumbnails