Thursday, February 25, 2016

Christmas in February

 It is the 25th of the month and time again for some Christmas fun! I am betting I won't need to rush to finish up any Christmas cards this year if I can manage to keep this up :) I have had most of this card put together for a while, just waiting for the right inspiration to finish it off with main image.


I finally settled on the deer image from In the Meadow from the Occasions Mini. They look so sweet and peaceful. The sentiment is from White Christmas which you can find in the Annual Catalog. The vellum is from the Holiday Mini, but I know you all have plenty of it left ;) I think that the pine boughs and pinecones are the perfect backdrop for these deer. I used a few retired goodies on this card. Perfect use of the stash of stuff in my craft room! The deer are watercolored with different intensities of the same ink. The designer vellum is bigger than the white cardstock it is stitched too, and I love that look. How about you? OK, here are the detailed instructions:
  1. Create a 4¼"x5½" top folding cardbase from Baked Brown Sugar. 
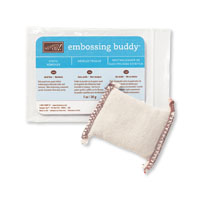
  2. Wipe the inside of the card with an antistatic tool such as the Embossing Buddy. Using Versamark ink, stamp the pine bough and pinecone image down one side of the inside panel. Preheat your heat tool while you sprinkle the on the gold embossing powder and tap off the excess. The hotter the gun, the less warping you will have. Now heat set the powder!
  3. Stamp the second part of the sentiment in Archival Black ink inside the card. 
  4. Cut a 3¾"x5" piece of Whisper White, and a 4"x5¼" piece of Designer Vellum. Lay the vellum on top pf the Whisper White, center it, then stitch together. Adhere to the card front.
  5. Cut a 2¾" square of Watercolor paper. Stamp the deer image and the sentiment in Archival Black ink. I stamped the deer first, then later added the sentiment, but do it however makes sense to you. 
  6. Watercolor the fawn with a light wash of Baked Brown Sugar using an Aqua-painter. I also used a barely damp watercolor paintbrush to move the color around for better control. After the fawn has dried, watercolor the momma deer in a more intense wash of Baked Brown Sugar with the same technique. LET IT DRY.
  7. After it is dry, stitch around the edge. If it is still damp, you will end up with brown fingerprints all over the panel. And then you will have to go back, wet those fingerprints, and hope the color lifts off the watercolor paper. Yeah, that's what happened to me :)
  8. Apply dimensionals  to the back of the image panel and adhere to the card front. 
All done!

I hope you can see the watercoloring on the image better here. It was actually quite easy to do.

Hereyou can see the embossed pine boughs in some glittery gold embossing powder from my stash. And the rest of the sentiment from White Christmas.

How is your Christmas Stash coming along?

If you would like to purchase some of the items I used today, here are some convenient links to help you out :)  And if your order is less than $150, please use this month's Host Code, which you will find at the top of the sidebar to the right.

  Product List

Friday, February 19, 2016

Strawberries and Bricks

Aren't these strawberries sweet?! I used the Market Fresh and Endless Thanks stamp sets on this card.  Here is what I had to say about modifying the sentiment in an earlier post:

You  will also notice that the sentiment on the strawberry image is not the one on the stamp. Lots of people have commented on the possible interpretations of "Just Ripe for You", so I decided to carefully cut that part of the stamp out with my Snips to start the hole, and my rubber scissor to finish the job. And guess what? There are loads of sentiments that fit in the banner! Anything from And Many More...and Teeny Tiny Wishes, one from Watercolor Wings, several from Sprinkles of Life, and so many more!
 I bet there are even more sentiments that would fit in there! And on top of that, Dies by Dave has a die set for Market Fresh :) And I used it for this card!


This card ended up in a stack of 24 thank you cards I gave to a mommy-to-be at her baby shower. She and her mother loved them all, and helped me destash. She was worried that she has wiped out my stock. Yeah, no. I still have more than that in my stash!! I better get to selling those cards, and sending out thank you cards!
OK, here is how I made this card:
  • Cut a piece of Thick Whisper white to 5"x6", score in half, so at 3" on the 6" side. Put the card front into the Brick Wall embossing folder and run through your die cutting machine. 
  • Either cut a Blushing Bride banner to fit, or use a leftover banner from the Chalk It Up To Love Paper Pumpkin kit. Lay the polka dot mask from Happy Patterns set over the banner and color the dots in with a Blushing Bride marker. Outline with Signo white gel pen. Adhere to the carfront.
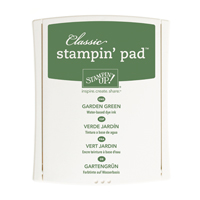
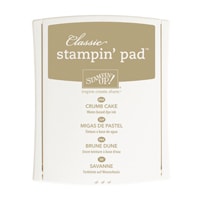
  • Take a piece of watercolor paper that is at least 2½" square, and stamp the strawberry image and your chosen sentiment in a waterproof ink. Our Archival Basic Black is fantastic by the way! Bold black and waterproof. Color in with an Aquapainter and ink squeezed onto the lids of Wild Wasabi, Garden Green, Cherry Cobbler, and Crumb Cake inkpads. Fussy cut, or die cut with the Dies by Dave matching dies. 
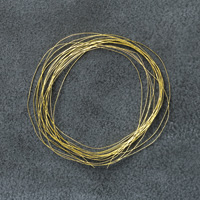
  • Stick a bunch of dimensionals on the back of the strawberries and peel the backing off, then set aside. Create a tangle of Gold thread adn stick to the exposed dimensionals, arranging as you want them. Then stick this whole thing to the banner.
  • Inside the card, stamp the strawberries in the corner of the panel in Crumb Cake. 
  • For the envelope, take a piece of Blushing Bride DSP and cut to the correct size and follow the directions on the Envelope punch board. I have been using retired DSP to make all kinds of envelopes, helping to destash those too! 
  • All done!
As always, if you have seen something you need for your crafting life, just click the image in the supply list below and it will take you to my store! If your order is less than $150, please use this month's Host Code: PCUN2KHD
And be sure to check the box letting me contact you, as I can't send you a thank you card if I can't see your address :)  I promise, I will only send you happy mail, no junk mail!

Product List

Tuesday, February 16, 2016

2016 Sale-A-Bration International Blog Hop

Welcome to our Sale-A-Bration blog hop! This group of international demonstrators is getting together to highlight some of the fantastic products available in this year's SAB catalog. You are going to want all of it, I am telling you right now, lol!

I love the variety of styles and the great sentiments in the collection this year. I can't wait to get the Party Pants and the Pedal Pushers sets myself, but I have been enjoying playing with the Flowering Fields set this time :)

I was invited to join this hop when one of my cards was one of Kyle Bertucci's most-pinned of the week. How could I resist?! I will be hopping with some of the really big demos from around the world and am feeling a bit of pressure. You will all have to let me know if I met the standards ;)

You probably just arrived from Rose Mary Coleman's blog. I am certain that she inspired you with her crisp and clean style :)

I was struck by a mental image of these wildflowers growing out of the retaining wall in my yard, and this card is where that ended. I used three of the SAB offerings for this card- the Flowering Fields and Perfect Pairings sets, and the Botanical Gardens vellum DSP.

The Crumb Cake diagonal piece is embossed with the Brick Wall embossing folder, then brushed with a barely dampened paintbrush and Crumb Cake and Whisper White inks.

From this angle you can see that the "wall" is up on dimensionals. And maybe you can see that the flowers are watercolored.

Inside I stamped the flower again in Archival Basic Black ink, then used a blender pen to color it like the ones on the front of the card. Then a swirl of Clear wink of Stella to add a little glam over the flower head :)


As always, if you have seen something you need for your crafting life, just click the image in the supply list below and it will take you to my store! If your order is less than $150, please use this month's Host Code: PCUN2KHD
And be sure to check the box letting me contact you, as I can't send you a thank you card if I can't see your address :)  I promise, I will only send you happy mail, no junk mail!

Now, be sure to continue hopping along to the other blogs. There are going to be so many great ideas, you won't want to miss a single one!

Tami White
Kylie Bertucci
Bruno Bertucci
Rose Marie Coleman
Tanya Boser
Katina Martinez
Allison Okamitsu
Shannon Lane
Julie Kettlewell
Lynsay Mahon
Connie Collins
Sarah Berry


Product List

LinkWithin

Related Posts with Thumbnails