Sunday, September 14, 2014

Stamp Review Crew: Truly Grateful Edition

http://stampreviewcrew.blogspot.com/2014/09/stamp-review-crew-truly-grateful-edition.html
Welcome Fall! Really, I love fall. Even though it kicks up my asthma and I spend a fair bit of time coughing, I just love the color of the sky. The crisp, cool evenings. The changing colors of the leaves. The bounty of garden harvest, and everything apples, pumpkins, and squash! LOVE, I tell you! I really could go on & on :) And this edition of the Stamp Review Crew is featuring a fabulous fall set. I really couldn't stop creating with it!

If you are following along from the beginning, then you just arrived from Shana Gaff's blog. I can't wait to see what she made! If you get lost, you can always find your way back on track on the official Stamp Review Crew blog post for this hop, where the links always take you exactly where you want to go :)

Ok, I am going to admit right now that I got a little carried away making projects for this hop. I cut out six 4x4 card bases and 3½" panels. Then I went ahead and made 5 cards just with this set!

Look how awesome these wheat sheaves look with the Hello Honey ink! The perfect golden yellow. I happen to have a love of fountain pens and the amazing array of inks available for them. I have one called Noodlers Golden Brown that matches the Hello Honey so well, I used it here to outline the front panel. I wanted just a touch of the gold twine, and the knotted loop at the top was just perfect. The sentiment is outlined with white gel pen, of course :)


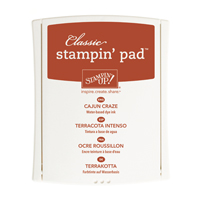
Next, I grabbed a couple more colors to add to the Hello Honey with Soft Suede and Cajun Craze. I just got the Hi There set, and I love the size of these sentiments!

Inside, I did a stamped off Soft Suede acorn, and then stamped the "nuts about you" sentiment from the set of the same name. Love that sentiment too!

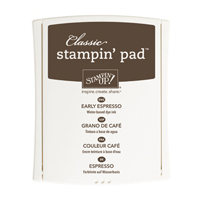
Here I used an Aquapainter to watercolor the panel with Hello Honey, Tangelo Twist, and Baked Brown Sugar. Then I dried it with my Heat Gun, cuz I am impatient like that :) Next, I stamped the chevron wood stamp twice in Soft Suede to cover the panel. And another sentiment from Hi There stamped in Early Espresso!

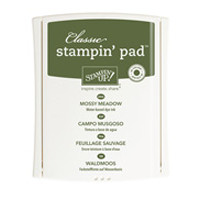
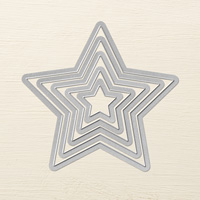
How about a nice masculine birthday card? This time I used Mossy Meadow, Tangelo Twist, Hello Honey, and Island Indigo to stamp a corner of the chevron wood pattern in each color. I die cut a star from Soft Suede, then paper pierced with the Eclectic Paper Piercing Pack. The ribbon is Mossy Meadow, and the birthday sentiment is from And Many More in Early Espresso again.

This last one of the 4x4 cards is my favorite I think!
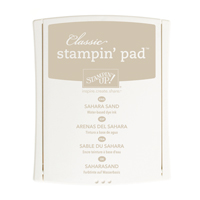
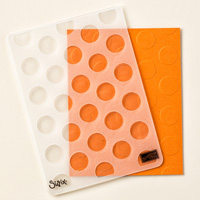
  1.  I took the 3½" square panel and embossed with the Large Polka Dot embossing folder. Then I lightly stamped the chevron wood pattern in Sahara Sand over it. It mostly inked just the raised areas and makes a very interesting background. 
  2. I stitched around the panel with my sewing machine. 
  3. Then there is a strip of Naturals Chevron ribbon, a strip of Woodgrain embossed Soft Suede,and popped up on dimensionals.
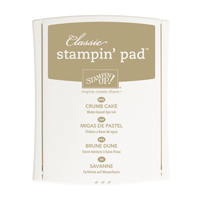
  4. Stamp and punch out 3 log slices in Crumb Cake, Early Espresso, and Baked Brown Sugar with the 1-3/8" Circle punch. Pop the center slice on dimensionals. More white gel pen details to finish it off!

Here is a different angle, so you can hopefully get a better view of the texture and dimension :)

 Now, this one happened Saturday night after a pile of family left. We had just celebrated my oldest son's 25th birthday with lasagna, cake, and gourmet chocolate. I was putting together this post and I just could not get the thought of a shaker card with this set out of my head! So, as happens sometimes, I had to stop what I was doing and let the inspiration take fruit.
  1. The top panel is watercolor paper embossed with white embossing powder and the chevron wood pattern, then I used an Aquapainter and Crushed Curry ink to add uneven color. When that dried, I cut the window with a die from Chalk Talk
  2. Then I stamped the acorns in Soft Suede on a scrap of watercolor paper and used the Aquapainter again to move the Soft Suede around on the acorn cap, and then add some Cajun Craze to the bottom. Fussy-cutting ensued!
  3. I made a thin mat of Cajun Craze cardstock with the center cut out and glued it to a white card base, and then stamped the sentiment from And Many More in Crushed Curry and Soft Suede.
  4. Cut a rectangle of Acetate to generously cover the window and sticky strip to the back of the watercolor panel. Apply strips of foam tape all over the panel to pop it up and to create a space for the shakers. Make sure there are no gaps for the sequins to leak out of. 
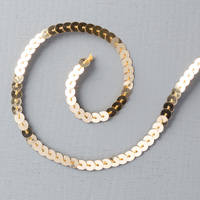
  5. Place a pile of gold sequins, frosty sequins, and one acorn in the area of the card front that will be the shaker, then carefully place the foam taped panel on the card front. Now shake it a bit just to play with it :)
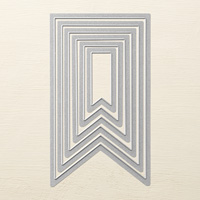
  6. Cut a piece of Burlap trim down the center and dovetail one end. Adhere to card front with sticky strip. Stamp happy birthday in Soft Suede on a scrap of Crushed Curry, then die cut with Itty Bitty Banner die. Add white gel pen accents. 
  7. Using dimensionals, adhere the remaining 2 acorns to the card front, then the happy birthday banner on top of that, with dimensionals also. 
  8. Stamp 3 acorns inside the card without reinking between. Use blender pen to color. Done! 
Here you can see the blender pen colored acorns.
So, what do you all think? Have I convinced you this is the most awesome set ever? Well, you can't say I didn't try ;) Ha! And I just realized this card has the same color scheme as the banner and buttons, which I made long before I made this card, lol!

OK, now that I have overloaded you all, how about a fresh take with Miss Wendy Weixler! She is next up on this hop :)

http://wickedlywonderfulcreations.blogspot.com/2014/09/stamp-review-crew-truly-grateful-edition.html

http://stressfreestamping.blogspot.com/2014/09/the-stamp-review-crew-truly-grateful.html

Saturday, September 13, 2014

Ghostly Smiles


It is long past time for me to try to get back on track doing more stuff on my blog. Honestly, this has been a very busy summer for me. I have spent most of my stamping time organizing the Stamp Review Crew, and over the last 2 months, I have been purging my old stamp sets. With that came reorganizing the ones that are retired but I still want to keep. This has made me want to play with some of my old favorites. I have seen so many cute cards with the jack-o-lantern faces from Freaky Friends stamped on the Large Polka Dot embossed paper, I had to try it myself. I wanted this to be a card I could send anytime this fall, not just for Halloween.I don't have Freaky Friends, so I pulled out these 2 sets and this card just flew together! These sets are retired as physical stamps, but both are still available as MDS downloads. How awesome is that?! I can't wait to send this to someone special :)


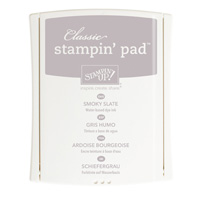
This is a 4x4 card with a 3¾"x3¾" panel that is embossed with with the Large Polka Dots embossing folder, then stamped with the faces from Pumpkin Patch. Then I took a scrap of the Naturals White and stamped the sentiment from Happy Watercolor in Momento Black ink and the dots from Happy Watercolor in Smoky Slate, stamping more than once before re-inking. I die cut the small banner, and then the next size up in Basic Black. The Black banner just cried to be embossed too, so I had to do it :) The banners are glued together and popped up on dimensionals. I taped the ends of the Silver Bakers Twine to the back of the faces panel, then popped the whole thing up on dimensionals.


Inside, I stamped a black face, a full strength Smoky Slate, and a stamped off Smoky Slate. Now, I need to decide who needs a little pick-me-up!

 Ok, I must be off to bed! I have a bunch of family coming from out of town to celebrate my oldest son's birthday. David turned 25 years old on Tuesday, and my in-laws are coming from 2 hours south, and all of my boys and their ladies, and my grandson are coming! I already made pumpkin bread, and tomorrow I must make cheesy garlic bread from scratch, a greens salad, and some chocolate chip cookies to go with the lasagna and better-than-sex cake my mother-in-law is bringing :) I'm getting hungry already, lol!

Wednesday, September 10, 2014

Birthday Blues


Ok, so sometimes I think I have posted a card on my blog and find out months later that I have NOT shared said card. I really have a pretty good memory, but sometimes things slip through the cracks... Well, this card is one of them. I made this card back in May. I love this card. I can't believe it is still in my stash! Said stash needs to be thinned out.... I need to send more of these lovelies out to family and friends, and bring some to work to sell.... ok, enough rambling. Let's get on with the show!

I am quite sure that I used a sketch challenge for this card, but i will be darned it I can remember which one it was. And I used several things that are now retired... but it is probably on of the first cards I made using the Blendabilities :) Now, I look at this card, and which that the Core'dinations cardstock and the Illuminate ink had not retired. I don't think that I will ever get tired of using either of them. I do have a stockpile of the cardstock and the ink refills for the Illuminate pad... and I must resist the urge to buy more of the Core'dinations off the clearance rack!
  1. I embossed and sanded a panel of Island Indigo Core'dinations.Outlined with white gel pen.
  2. Stamped a strip of Naturals White cardstock with Illumniate ink and the dots image. 
  3. Stamped the flower sprig in Momento ink and colored with the Blends, rounded the corners and popped it up. 
  4. Stamped the 2 sentiment pieces and punched, outlined with white gel pen. 
  5. Colored some rhinestones with Blendas.
 I stamped and colored a panel for the inside of the card too. Mustn't have a naked inside!

I hope you like this card as much as I do. Please share your thoughts with me, I love to hear from my readers :)


LinkWithin

Related Posts with Thumbnails