Sunday, March 20, 2016

Stamp Review Crew: Made With Love Edition

http://stampreviewcrew.blogspot.com/2016/03/stamp-review-crew-made-with-love-edition.html

Are you ready for another edition of the Stamp Review Crew? Cuz here we come with the darling Made with Love set! This set set is sooo stinkin' cute, and I waited until the beginning of 2016 to get it! Why did I wait so long?? Get ready for some awesome projects :)

Welcome to you early hoppers. Just remember that we post early on Sunday night to work out the kinks. All should be well by Midnight US Central Time :) 

If this is your first time hopping with us, then I should tell you that we are an international group of Stampin' Up! demonstrators that gets together every first and third Monday of the month to feature a single stamp set. We share lots of ideas for that set to get you excited and inspired :) You can check out the master blog roll on our home blog, and find all of our past hops, and all of the links will take you directly to the posts you are looking for!

If you are following along in order, then you just arrived from Rochelle Blok's blog. Lovely stuff right!

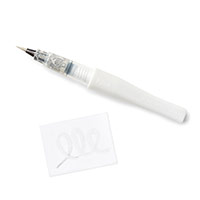
I went simple this time, just stamping these sweet little critters in Archival Black on watercolor paper and then coloring them with an Aqua-painter. I added a little Wink of Stella over the images too, cuz I could :)

I popped the panel up on some dimensionals after I stitched around the edge. I just adore this sentiment! It makes me smile whenever I look at it :)

And I colored this little deer with a blender pen and more Wink of Stella.

All right, you left Australia to come to my blog, now it is time to go back to Australia to Nikki Spencer's blog. Are you jet-lagged yet ;) Nikki will perk you right up!

http://nikkispencer-mysandbox.blogspot.com/2016/03/stamp-review-crewmade-with-love-edition.html


http://rochelleblok.blogspot.com/2016/03/the-stamp-review-crew-made-with-love.html


Product List

Monday, March 14, 2016

Birthday Fluff

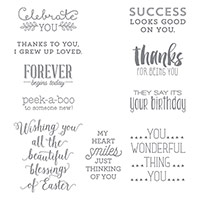
I don't now about you, but whenever I see this sentiment, the Beatles song "Birthday" that has these lyrics goes through my head! And if you would like it stuck in your head too, here is a video I found :)

AND your welcome :)

Well, it just so happens that it is my #3 child's birthday today. Happy 24th Birthday Dakota!!! We will be taking this young man out to eat and for a stout or 2. This big, burly, bike-riding, hard-working fella of mine does like a good dark beer :) In moderation, of course! Of course, he does not read my blog, so he probably won't see this, but he may hear his mother singing to him this evening! Poor guy, lol!

Now, this is NOT the card he will be getting, lol. I have not decided which card he will get yet. I have quite a stash of cards built up to choose from :)
This is one of the make and takes we did at a workshop I did last month. I let everyone pick which DSP from the Wildflower Fields paper that they wanted, then they used the coordinating stamp set, Flowering Fields, to stamp the front panel and used blender pens to color the images. This is one of the example cards I brought. I like the sunny yellow and dandelion fluff.

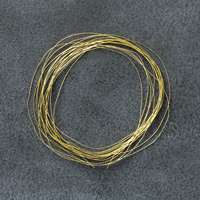
Can you see the gold thread wrapped around the bottom of the image panel? And that the image panel is popped up on dimensionals! Wrap first, dimensionals second! Love that sentiment? It is from Suite Sayings! I stitched the vellum strip on, that is my favorite way to attach vellum.  But it is a little hard to lug my sewing machine along to a workshop, so I brought my mini stapler.
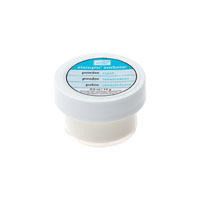
The sentiment is actually embossing with clear embossing powder, which always looks fab to me :)

More blender pen work, and the rest of the sentiment is from Happy Happenings. I think the fonts of these 2 sentiments compliment each other well!

If you would like to purchase some of the items I used today, here are some convenient links to help you out :) Remember, you earn 1 Sale-A-Bration item for every $50 in merchandise that you purchase! This all ends after March 31st-don't miss out!
And if your order is less than $150, please use this month's Host Code, which you will find at the top of the sidebar to the right. Or right here:

WBRR2TWQ


Product List

Thursday, February 25, 2016

Christmas in February

 It is the 25th of the month and time again for some Christmas fun! I am betting I won't need to rush to finish up any Christmas cards this year if I can manage to keep this up :) I have had most of this card put together for a while, just waiting for the right inspiration to finish it off with main image.


I finally settled on the deer image from In the Meadow from the Occasions Mini. They look so sweet and peaceful. The sentiment is from White Christmas which you can find in the Annual Catalog. The vellum is from the Holiday Mini, but I know you all have plenty of it left ;) I think that the pine boughs and pinecones are the perfect backdrop for these deer. I used a few retired goodies on this card. Perfect use of the stash of stuff in my craft room! The deer are watercolored with different intensities of the same ink. The designer vellum is bigger than the white cardstock it is stitched too, and I love that look. How about you? OK, here are the detailed instructions:
  1. Create a 4¼"x5½" top folding cardbase from Baked Brown Sugar. 
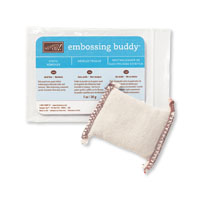
  2. Wipe the inside of the card with an antistatic tool such as the Embossing Buddy. Using Versamark ink, stamp the pine bough and pinecone image down one side of the inside panel. Preheat your heat tool while you sprinkle the on the gold embossing powder and tap off the excess. The hotter the gun, the less warping you will have. Now heat set the powder!
  3. Stamp the second part of the sentiment in Archival Black ink inside the card. 
  4. Cut a 3¾"x5" piece of Whisper White, and a 4"x5¼" piece of Designer Vellum. Lay the vellum on top pf the Whisper White, center it, then stitch together. Adhere to the card front.
  5. Cut a 2¾" square of Watercolor paper. Stamp the deer image and the sentiment in Archival Black ink. I stamped the deer first, then later added the sentiment, but do it however makes sense to you. 
  6. Watercolor the fawn with a light wash of Baked Brown Sugar using an Aqua-painter. I also used a barely damp watercolor paintbrush to move the color around for better control. After the fawn has dried, watercolor the momma deer in a more intense wash of Baked Brown Sugar with the same technique. LET IT DRY.
  7. After it is dry, stitch around the edge. If it is still damp, you will end up with brown fingerprints all over the panel. And then you will have to go back, wet those fingerprints, and hope the color lifts off the watercolor paper. Yeah, that's what happened to me :)
  8. Apply dimensionals  to the back of the image panel and adhere to the card front. 
All done!

I hope you can see the watercoloring on the image better here. It was actually quite easy to do.

Hereyou can see the embossed pine boughs in some glittery gold embossing powder from my stash. And the rest of the sentiment from White Christmas.

How is your Christmas Stash coming along?

If you would like to purchase some of the items I used today, here are some convenient links to help you out :)  And if your order is less than $150, please use this month's Host Code, which you will find at the top of the sidebar to the right.

  Product List

LinkWithin

Related Posts with Thumbnails