Woo-hoo! It is free stuff time of year, and we at the Stamp Review Crew are going to show you how to use all that free stuff you already got, right! I mean, you have placed a big, stock up your crafty supplies, get yourself lots of free goodies order, right? Well, if you haven't, you are going to want to as soon as you are done hopping! There are so many great goodies in SAB this year!!
Happy Valentine's Day to you early hoppers. Just remember that we post early on Sunday night to work out the kinks. All should be well by Midnight US Central Time :)
OK, let's get the info for newbies to the hop done:
If this is your first time hopping with us, then I should tell you that
we are an international group of Stampin' Up! demonstrators that gets
together every first and third Monday of the month to feature a single
stamp set. We share lots of ideas for that set to get you excited and
inspired :) You can check out the master blog roll on our
home blog, and find all of our past hops, and all of the links will take you directly to the posts you are looking for!
If you are following along in order, then I am the first stop! But maybe you started in the middle somewhere, which means you just got here from our newest Crew Member,
Bruno Bertucci from Australia! Be sure to give him a warm welcome :)
I used a
Friday Mashup challenge for this card, and had some fun with my Gansai Tambi watercolors. This is a large card, 5"x6½", because that is the size that the watercolor panel would fit on nicely :)
- First I taped the watercolor paper down to a board with painters tape. Then I painted on a wash of Deep Pink (#37) in the bottom 1/3 of the card, then Dark Pink (#34) in the middle 1/3, then continued to paint the lighter pink up the panel adding more water and no paint. The I let it dry. Yes, really. I did not use the heat tool :)
- Next I used Rich Razzleberry and Rose Red, both stamped off a couple times, to stamp the ice cream cone all over the panel. I should have stopped here.
- But I couldn't... I placed the hearts mask over the card and spritzed with some Pearlized Water. This resulted in some of the stamped images bleeding a bit. Ya, not the look I was going for...
- OK, moving on. I stamped the sentiment on a 1"x4½" strip of vellum in Versafine Onyx Black, sprinkled with Clear embossing powder, and heated with a heat tool until melted.
- Stitched the vellum strip to the watercolor panel, and all the way around the panel just at the edge of the paint.
- Applied foam tape (dimensionals) to the back of the panel and stuck it to the 5"x6½" Thick Whisper White card base.
- Use Fine-Tip glue pen to adhere some pretty pink sequins from my stash.
- For the inside, I inked up the ice cream cone in Rich Razzleberry, stamped it off once, then stamped it right in the middle. And used the Clear Wink of Stella brush pen to add a little shimmer to the ice cream.
- All Done!

Here is the shimmery ice cream. Yummy!
Can you see the shimmer of the hearts? Ya, I don't either. Just the "water spots", lol! Do you sometimes have a hard time stopping?
Next up is a card that is a complete redo. I started out with a wash like you see here, but then I tried stamping balloons all over is and then spattering and using water to remove color from the balloons. MAJOR fail. So, since this is watercolor paper, I brushed plain water all over it and used a clothe to dab the color off. Twice. Then I started over with my wash. :) I did use a
CAS(E) this Sketch challenge to make this card.
- Start with Island Indigo ink on the bottom, then add Hello Honey from the top down, overlapping in the middle of the card to create the green. Looks like Mint Macaron, doesn't it :) Let it air dry. I know-so hard to wait! But so worth it here.
- Then I took the starburst stamp from Kinda Eclectic and spritzed it with water, then let it sit on the card for about 30 seconds so the watercolor paper has a chance to absorb some of the water. This time I did dry it with the heat tool. Really well.
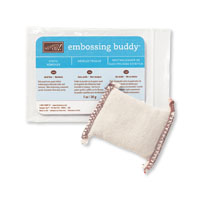
- Wipe panel with embossing buddy, stamp with Versamark ink, sprinkle with White embossing powder, then heat. You know how to do this part ;)
- Outline the panel with Signo White gel pen.
- Apply dimensionals to the back of the panel. Don't be shy with them, you do not want a saggy card!! Stick to a Thick White card base.
- Inside, ink up the starburst in Mint Macaron, stamp off once, and stamp in the center of the inside panel.
- Done!

Like it? I am sure I can write over this image with a pen or a pencil and it will look great!
I think you can see the starburst on the front of the card a little better in this picture.
All right, I think this is my favorite of this batch of cards. It is just so fun!! Yes, watercoloring again. We are all just going to have to live with my current obsession :)
- Cut a panel of watercolor paper to 4"x5¼". Apply a wash of Crumb Cake with an Aquapainter. Dry with heat tool. Yes, paint the whole panel, don't worry about where the chicks will go, it will be fine. I promise!
- Stamp the chicks all over the panel with the Archival Basic Black ink. It is waterproof!
- Paint the chicks with different colors of inks using the Aquapainter, dabbing birdie bellies to lighten the colors there if needed. Air dry or heat tool dry, up to you.
- Stitch around the panel.
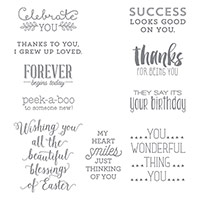
- I did stamp the sentiment on a large scrap on the bottom edge of Thick Whisper White with the Archival Black ink, then trimmed it off to create a ¼" strip, then dovetailed and adhered to the card with dimensionals, and trimmed the end off.

Inside I used Archival Basic Gray ink stamped off once to stamp the chick, a blender pen to color the little fella, and Gray full strength to stamp the sentiment. Then I showed it to my hubby and asked him if it made him think of Peeps. That is totally what I was going for. He says "It would be even better if it said Peep-a-boo".
I really did not take much to convince me to change it :) I stamped the sentiment again on a piece of scrap card stock, cut out the "p", and glued it over the "k". It totally looks like an edit, but a cute and punny one. I love it!!
Alrighty then, time to hop on over to
Martha Inchley's blog in Canada, she is gonna wow you, I just know it!
Product List