I am going to try something new this year. I thought it was something we would all enjoy, and who doesn't need more joy :) I will post a Christmas card every month on the 25th to keep us all inspired and to build up our stock of cards to send next year. So here we go with Christmas in January!
It is a snowy day across the areas of the US that get snow, including my house. I am watching big fluffy flakes fall as I write this post. So pretty! My crazy dogs all love to go out and roll in the fresh snow, so it has been quite the revolving door, lol! We live out in the wilderness, so we can let them out unsupervised, one at a time. That's a good thing, since a single in-&-out cycle of one-dog-out-at-a-time here can last for 2 hours! I also got the unexpected bliss of getting to take some of my Use-or-lose vacation hours this week, and I don't have anything else planned since I was going to be working :) Bonus crafty time!!
This card just popped into my head almost fully formed. I love that! I wanted the sentiment to weave through the wreath, and to have pretty white berries on the wreath. The rest was the result of what was laying on my desk. Yes, my desk is rather messy at times...
And here is how I made this card:
- Take a piece of Crumb Cake card stock that is at least 4"x4", cut the center of the wreath out with the framelit.
- Stamp the wreath in Mossy Meadow. Stamp the just-a-few-leaves stamp in Mossy Meadow again. This makes those leaves just slightly darker than the rest.
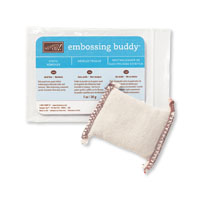
- Dry the ink with the heat tool, wipe with the Embossing Buddy so the embossing powder doesn't stick tot eh wrong stuff. Stamp the berries in Versamark. Sprinkle with White embossing powder and heat set.
- Die cut the outer edge of the wreath.
- Cut a piece of Whisper white to 4"x5¼". Emboss with the Softly Falling folder.
- Cut a strip of DSP to 2"x5¼". Adhere to the left side of the White panel, leaving about ½" of white exposed to the left of the panel.
- Cut a piece of Vellum to 1-3/8"x4". Wipe with Embossing Buddy, stamp sentiment in Versamark on the Vellum. Sprinkle with Gold embossing powder, and heat set.
- Weave the vellum strip through the wreath, flip over and apply dimensionals to the wreath all the way around, Some of the dimensionals will be stuck to the vellum. Stick this down to the White panel after getting your placement the way you want it.
- Optional: Stitch around the panel with sewing machine.
- Adhere completed panel to a Crumb Cake card base.
- Ink up the bow stamp in Cherry Cobbler, stamp off once, the stamp in the center of the inside of the card. Stamp the greeting message in Early Espresso over the top of the bow.
This is what the inside looks like. So, what do you think? Will you be pulling out your Christmas stamps with me for the year? Please comment below to share your thoughts!
And if you would like to purchase some of the items I used today, here are some convenient links to help you out :) And if your order is less than $150, please use this month's Host Code: PCUN2KHD
Product List


No comments:
Post a Comment