Sunday, June 5, 2016

Stamp Review Crew: Papillon Potpourri Edition

http://stampreviewcrew.blogspot.com/2016/06/stamp-review-crew-papillon-potpourri.html

Welcome! We are celebrating one of the biggest symbols of summer, the butterfly with Papillon Potpourri! This set has been around for awhile, but it has a timeless appeal and lots of styles of butterflies to choose from. I am certain that if you don't already own this set, by the time you finish hopping, it will be on your wishlist for your next order :)

For those who are new to the Stamp Review Crew, here is a little background. We are an international group of Stampin' Up! demonstrators that gets together on the first and third Mondays of every month to do a blog hop. Each hop features a single stamp set to give you loads of inspiration for that set! The hops are archived at the Stamp Review Crew blog, and you will be able to click through each hop at any time, going directly to the posts for that hop whenever you want! And you can click on the banner of this post to go to the master blog roll for this hop also.

If you are following along in order, then you have arrived from Dawn Tidd's blog where she did an amazing job with this stamp set, I am quite sure :)

First up is this sweet set of little thank you cards using the new In-Colors. I just love how clean and true to color these inks remain when you watercolor with them!
  • I just cut some pieces of watercolor paper to size, then used my Aquapainter to lay down a wash of the color I wanted to feature!
  • After the wash dried, I stamped on the sentiment. 
  • The butterflies were stamped in the color ink shown on vellum, then heat embossed with clear embossing powder, then punched out with the Elegant Butterfly punch. There is a plain white butterfly behind each of the vellum ones so that they really pop on the watercolor wash.
  • See how I snuck in some of that gorgeous Ruched ribbon?! LOVE, I tell you!
  • Or course, me being me, I had to stitch around each of the watercolor panels, then I adhered them down to the Thick Whisper White card bases.

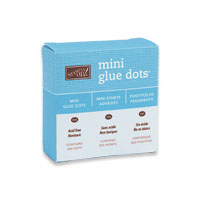
The little butterflies were made the same way as the ones one the outside, but punched out with the Bitty Butterfly punch. I folded them in half, then used a mini glue dot to stick them to the card base.

Next up is another watercolor piece. This time I used some resist technique.
  • I stamped the butterflies all over a panel of watercolor paper I had taped down with painters tape, then heat embossed with Clear embossing powder. 
  • Next I sponged on some Flirty Flamingo, Peekaboo Peach, and Crushed Curry. Then I spritzed the panel with water, allowing the colors to soften and blend. Then I let it dry. Ok, I dried it with my heat tool, who am I kidding!
  • Next I spattered some clean water on the panel, let it sit for a few seconds, then dabbed it off with a clean cloth. This removed some of the ink in a spatter pattern. 
  • Then I took a 1½" strip of vellum, stamped the sentiment in Versamark, and heat embossed with Copper embossing powder. 
  • Then I stitched the ends of the vellum strip to the butterfly panel. Then adhered the whole thing to a Flirty Flamingo card base with dimensionals.
  • Stamp a few more butterflies in Flirty Flamingo, stamped off once, inside and the card is complete!
 Isn't that a fun birthday card?!

I have one more for you, then I better stop! This one uses some of the Playful Palette DSP stack.
  • Cut a piece of vellum to 4"x5¼". Cut a piece of Mint Macaron to 3¾"x5". Emboss the Mint panel with the Fluttering embossing folder. Stitch these two pieces together, the Mint on top. Adhere to a Thick Whisper White card base with Tear & Tape, SNAIL, or Fast Fuse.
  • Cut a 1½"x4" strip from the Playful Palette DSP, then cut a dovetail into one end. Adhere to the Mint panel. 
  • Take a doily and die cut a 3" circle from the center. 
  • Stamp a large butterfly with Archival Black ink on a piece of watercolor paper, use Aqua-painter to color butterfly with Flirty Flamingo and Peekaboo Peach. when this is dry, add Clear Wink of Stella to the wings. Die cut the image with an approximately 2" circle die, or a 2" circle punch. 
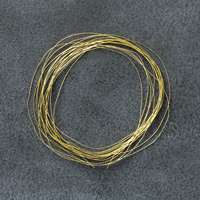
  • Add some dimensionals to the back of the circle, make a nest of gold thread, and stick it to the back of the circle, fine-tuning the thread placement to get it the way you want. Then adhere the circle to the doily. Add dimensionals to the back of the doily and adhere to the DSP banner on the Mint panel. 
  • Stamp two banners in Crumb Cake on a scrap of Kraft cardstock, punch out with Duet Banner punch, then add sentiments, and trim one of the banners to just the center portion of the banner. Adhere to the full banner piece with dimensionals, add a couple more dimensionals to the back of the full banner, then adhere to the card front. 
  • Inside, I stamped some more butterflies, then used a Blender Pen to add color, and went over that with the Clear Wink of Stella. All Done!
So what do you think? Do you need to dig this set out and play with it again yet?  :) You can see a list of the supplies I used at the bottom of this post.

That's it for me, now it is time to go see what glorious projects Jessica Williams has created!

www.thepapercaper.com.au/2016/06/06/srcpp

http://tiddbitsfromdawn.typepad.com/tiddbits-from-dawn/2016/06/the-stamp-review-crew-papillon-potpourri-edition.html

As always, if you have seen something you need for your crafting life, just click the image in the supply list below and it will take you to my store! If you order less than $150, please use this month's Host Code, which can be found at the top of the sidebar on the right. 

And be sure to check the box allowing me to contact you when you check out. I can't send you a thank you card if I don't know your address! And I promise to only send you happy mail, no junk mail :) Product List
Heat Tool
[129053]
$30.00
Big Shot
[143263]
$110.00
Glue Dots
[103683]
$5.25

Saturday, June 4, 2016

Graduation in Gold: A SCS Creative Crew Challenge!

Graduation season is upon us!! High schools and colleges around the world are wrapping up their year, and kids everywhere are starting a new journey into "adulting", as my kids put it, lol! It really is a time to celebrate all of the wonderful achievements so far in their lives, and the many more yet to come.

Splitcoaststampers.com has oodles of challenges going on all the time, and I have been honored to be asked to be a Creative Crew member from May-August 206, which means I will be creating a project for each of the Creative Crew monthly challenges in those months.

This card is created for this challenge:
 CCREW0616HF, CreativeCrew, SUO or SUM - Holiday Focus: Graduation! Tell us what card you love from the catalog (be sure to include the page number). CASE it to make a graduation card!

 My inspiration was on page 22 of the new catalog, isn't it darling?!

There is a lot going on here! Heat and dry embossing, glitter, Wink of Stella, and Perfect Pearls!
Here is how I did this:
  1. Cut a piece of Kraft cardstock to 8½"x6½", score 8½" side at 4" and 8" to create a 4"x6½" top fold card base with a ½" flap to fold up into the card interior. 
  2. Cut a piece of vellum to 1"x6½" and stitch or adhere to the ½" interior flap. Stamp the stars in Versamark on the vellum flap and gold heat emboss.  Then stitch or adhere the sides to create a pocket that will hold money or a check.
  3. Cut a piece of Whisper White to 3¾"x6¼". Cut a piece of Basic Black to 3½"x6", then cut a diagonal strip off the bottom. Eyeball where the diagonal edge will lay on the white piece, then stamp the stars in Versamark and Gold heat emboss. 
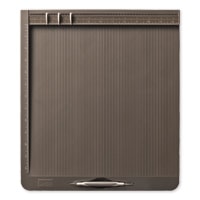
  4. Use the Lucky Stars embossing folder to emboss the Black piece, then score 2 lines about ½" apart perpendicular to the diagonal line. You can use your paper trimmer or the Simply Scored Board. Stamp the sentiment in Versamark between the scored lines and Gold heat emboss.
  5. Stitch around the Black panel with sewing machine and white thread.
  6. Stamp the large and small solid balloon images from Balloon Celebration in Versamark on vellum, then sprinkle with Clear embossing powder, then a smidgen of Gold Glitter, heat set. Color the back of the balloons near the bottoms with Gold Wink of Stella. 
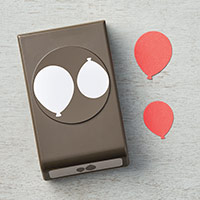
  7. Punch the vellum balloons and one small balloon from the Gold Glimmer Paper with the Balloon Bouquet punch. Apply a titch of Tear & Tape to the back of each and attach a piece of Gold thread to each. Adhere to the left side of the Black panel. 
  8. Apply dimensionals to the back of the Black panel and adhere to the White panel. Wrap the ends of the Gold threads attached to the balloons around the the bottom edge of the white panel and secure with some Washi or Scotch tape. 
  9. Spatter the embellished panel with Gold Wink of Stella and/or Gold Pearlized water (Gold Perfect Pearls added to water in a spritzer bottle). 
  10. Adhere embellished panel to the card base. All done!
 I added a sentiment from the retired set Pure Gumption to make it perfectly clear that this is a graduation card. Otherwise this card could be used for a great variety of occasions :)

In this angled view, you can see the shimmer on all kinds of areas, and the embossed stars, and the dimension a little better.

So, what do you think? Are you ready to give this a try? Maybe not so elaborate, but with the pocket on the inside for cash or a check.

As always, if you have seen something you need for your crafting life, just click the image in the supply list below and it will take you to my store! If you order less than $150, please use this month's Host Code, which can be found at the top of the sidebar on the right. 

And be sure to check the box allowing me to contact you when you check out. I can't send you a thank you card if I don't know your address! And I promise to only send you happy mail, no junk mail :)


Product List

Wednesday, May 25, 2016

Christmas in May

Are you ready fro more Christmas? I am really enjoying creating for this series, and I hope you are eager to see the 25th of each month to see what I have come up with :)

I decided to pull out a photo-polymer set that is not in any catalog, but is still available to purchase. It has great sentiments with fun fonts, and some great iconic images! And I dug out some Copper embossing powder from my stash to play with since it is all over the place in the new Annual Catalog that debuts in less than a week!! I only had enough Copper embossing powder left to do these projects as the stuff I had was from well over 10 years ago. The glitter ribbon is from the 2015 Holiday Mini, and I just know that you all are hoarding some in your stash right now, along with some of the Season of Style DSP stack from 2 years ago. Pull that stuff out and use it up! You really need to make some room for the new stuff coming soon, lol!

How about some Emerald and Copper, with some Playful Palette DSP?! Who would have thought this would look so much like Christmas?! This Ruched Ribbon is in the new catty too, and you are going to want to get all of the colors :)

What good is a gift tag if you can't write to To and From on it, right? This stamp is retired, but you will have to pry it from my cold dead hands! It is such a handy stamp, I will keep it forever. And hug it and pet it! Love it!! If you missed out on it, there are several resources out there for ordering custom stamps, and I highly recommend getting one similar. Here are a couple to take a look at rubberstamps.net and bossy Joscie

I am feeling lazy today, so I am not going to include instructions. If you are feeling the need for some tutelage, leave me a comment and I will help you out :)

As always, if you have seen something you need for your crafting life, just click the image in the supply list below and it will take you to my store! If you order less than $150, please use this month's Host Code, which can be found at the top of the sidebar on the right. 

And be sure to check the box allowing me to contact you when you check out. I can't send you a thank you card if I don't know your address! And I promise to only send you happy mail, no junk mail :)


Product List

LinkWithin

Related Posts with Thumbnails