

Stampin' Addicts are at it again with another blog hop to inspire you! We wanted to highlight some of the hidden treasures that are not in any of the catalogs. They are all fabulous finds and deserve more attention :)
If you are following along in order, you just came from Mary Trautner's blog, where she featured the photopolymer sets Countless Sayings I & II. Wow, right!
But don't worry, we won't let you get lost. You can head over to the chat thread for this hop and see the full blog roll too!

I am featuring the os, so interesting Eye-Catching Ikat photopolymer set.


For the other banner, I wet the smooth side of a piece of Watercolor paper with an Aqua-painter, then stamped the images over the wet paper. Some of the images were stamped a couple of times on top of each other to get the color intensity, and the mix of bleeding and sharpness, that I wanted. Which was, you guessed it, easy! After the watercolor paper dried, I went back and stamped over the images with different but coordinating stamps in Silver Encore again.


First I stamped along the bottom of the bag, front and back, then I took two 1" strips of Core'dinations Coastal Cabana and embossed them with Decorative Dots EF, sanded them, and glued them to the top of the bag. I had trimmed the bag down by about ½" to make the edges straight and even before I started. Then I pulled the gusset out at the top and lined up the edges, marked about 1½" in from each side, and used the Crop-A-Dile to punch holes for the handles. I used the lovely retired Sweater Trim for the handles (it is currently available on the clearance rack!) The vellum was attached with Sticky Strip, easy-peasy-lemon-cheesy!
Sorry this photo looks a little off kilter. To get the best lighting, I had to lay the bag on it's side edge, lol!


Now it is time to sail on over to Twila Davis' blog and check out her nuggets of inspiration with the Envelope Punch Board!


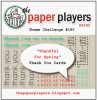
Supplies for Spring Thanks Card:


Challenges for Spring Thanks Card:


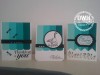
Supplies for Teal Birthday Card:
Challenges for Teal Birthday Card:


Challenge for Hello Card:


14 comments:
Love the patterns in this stamp set. The last card is so bold and happy... but I just love the multi-toned stamping on the wet watercolor paper.
Fantastic projects! I love how you combined the different patterns! Great way to show off this set!
Great job showing off this stamp set. Fabulous projects!
Absolutely awesome projects, Tanya! Such creative uses of this set. Your bright and cheery color combinations will definitely bring smiles to the faces of the lucky recipients! Thanks for playing with The Paper Players this week!
Now I have to get this set out and use it. You have inspired me. I love what you have done.
Hi Tanya! I chose you among the 11 top blogs that I follow for the Liebster award! Here is my blog so you can hop on and play along if you'd like. http://crazypaperfreak.blogspot.com/2014/03/liebster-award-nomination.html
Lovely bright and cheery thank you card, using our sketch! Thanks so much for playing along with us at Sunday Stamps!
Great patterns and colors in your pretty cards. I especially like the first card using the Sunday Stamps sketch. Thanks for joining us at Sunday Stamps this fortnight--please play along with us again soon!
:) Marie
What great combinations of pattern and colors! You really rocked this ser.
incredible projects (as usual!) Tanya, but the watercolor ombre card is amazing
Fun bunch of cards!
Thanks for joining this week’s Less is More Challenge
Anne
(Guest LIM commenter!)
Woozers! I love them all. I didn't even know we has a stamp set like this. lol
Wow Tanya, amazing cards! You've inspired me to get this set! Thanks so much for playing with us at Sunday Stamps.
Awesome projects! I love all the things you made with this set.
Post a Comment