Saturday, June 25, 2016

Christmas in June: Peaceful Snow Joy

Wow, June 25th is here already! And as my husband said as I told him what I was doing, "There are only 6 months 'til Christmas, and we haven't even started the shopping yet! Gasp!" He was totally kidding. We are the "shop in mid-December" type! That is, for any gifts that we don't create ourselves, lol!

I have a confession to make. I did not purchase very many Christmas sets from the Holiday Mini this year, until I found out which ones were carrying over. Then I think I ended up with almost every single one! I am a sucker for Christmas sets, and I keep 98% of them. Let's just say that if someone wanted to come make Christmas cards at my house, they might be a tad overwhelmed with the available options... I mean, I have a snowflake section!

SO I really didn't need another snowflake stamp set. But this one is sooo cute!!  :)


I am still on a watercolor kick, and I think I can feel the wind swirling the snowflakes around in this background! It feels very winterish :) And hey, I live in Minnesota so I should know what that feels like, lol! Here is how I made this card:
  • Cut a watercolor panel to 4"x5¼", stamp the various snowflakes in Versamark, sweeping from upper left to lower right. Sprinkle with Clear embossing powder and heat set. 
  • Tape the watercolor panel down to a board with painter's tape. Wet the paper with an Aqua-painter or a watercolor brush. Add Dapper denim to the left upper and right lower corner, tipping and turning the board to get some movement and blooming of the color. Dry with heat tool. 
  • Repeat the previous step two more times, using Sweet Sugarplum and Pool Party. 
  • Spatter some clean water across the panel, let sit for 30 seconds or so, then dab off with a clean cloth. 
  • From a scrap of Dazzling Diamonds Glimmer paper, die cut the "peace" die from Christmas Greetings thinlets. 
  • Cut a 1½" strip of Vellum, lay the peace diecut over it so you can figure out placement for the sentiments, then stamp the sentiments with Versamark. Sprinkle with Silver embossing powder and heat set. 
  • Dovetail the left end of the Vellum strip, adhere the "peace" with the Fine-Tip glue pen. Stitch the Vellum strip to the watercolor panel with sewing machine and thread. Add a little Fine-Tip glue behind the diecut on the back of the Vellum strip and adhere to the watercolor panel. 
  • Adhere the watercolor panel to the Thick Whisper White card base. 
  • For the inside, I used a technique to create a subtle watercolor look to the snowflake stamping. I inked the stamps up, stamped off once, then spritzed lightly with a couple pumps with the spritzer filled with water, then stamped on the lower right corner. 
  What do you think, good technique? I love this!! I think I should make a few more of this one, and each one will be different. That is the nature of watercolor :)

I did learn a lesson, again, about the painter's tape... if you reuse it, the tape  does not stick as well and will let some of the watercoloring leak underneath it. I am ok with it on this project, but it could really ruin the look of something that  needs a nice crisp edge.

Here I tried to capture the sparkle of that glimmer paper, so lovely! Very ice crystal. Can you believe I resisted the urge to add rhinestones and sequins?! I might make some with those items, but I really trying to expand my repertoire :)

I have a little help from the Merry Monday Christmas Challenge #210
http://merrymondaychristmaschallenge.blogspot.com/2016/06/merry-monday-210-peace-joy-love.html


And the sketch from CAS(E) this Sketch #178:
http://casethissketch.blogspot.com/2016/06/case-this-sketch-178.html


If you have seen something you need for your crafting life, just click the image in the supply list below and it will take you to my store! If you order less than $150, please use this month's Host Code, which can be found at the top of the sidebar on the right.

And be sure to check the box allowing me to contact you when you check out. I can't send you a thank you card if I don't know your address! And I promise to only send you happy mail, no junk mail :)

Product List

Tuesday, June 21, 2016

Paradise and You

So, I was not so sure about the Playful Palette DSP stack. I was a teenager in the 1980's and I vividly remember all of the patterns in this stack from back then. Let's just say I was not a follower back then, so this was not my favorite look. OK, I'm still not a follower, but the world is a much more diverse place now, and there is definitely something for every taste now, thank GOD!

But, all that being said, this DSP has grown on me. I just had to come up with some creative ways to use it :)

Basically, I just stamped on the DSP with versamark and Gold embossed it! Voila, I love it!! The heart image is also Gold embossed, diecut with the Hearts framelits. I don't have the new Layering Hearts framelits yet, bit I was kinda wishing I did when I made this. Bit I improvised, stamped the image again on a piece of Whisper White, and hand cut it, then flipped it over and adhered to the back of the embossed heart. This is a little trick I use to make the embossing pop a little more and make the sentiment more readable. And don't you love how well Mint Macaron and Emerald Envy go together?!

Add a little Mint Macaron stamping on the inside corner and it is done. Do you like it? I sure hope so :)

I created this card for the June Creative Crew DSP/Color Focus Challenge, go check it out!

If you have seen something you need for your crafting life, just click the image in the supply list below and it will take you to my store! If you order less than $150, please use this month's Host Code, which can be found at the top of the sidebar on the right.

And be sure to check the box allowing me to contact you when you check out. I can't send you a thank you card if I don't know your address! And I promise to only send you happy mail, no junk mail :)

  Product List

Sunday, June 19, 2016

Stamp Review Crew: Flower Shop Edition

http://stampreviewcrew.blogspot.com/2016/06/stamp-review-crew-flower-shop-edition.html
Happy Flowery Monday! It is certainly summer in full swing here in northern Minnesota. Lots of flowers to enjoy :) The Stamp Review Crew is excited to share another oldie but goodie stamp set, Flower Shop! 

For those who are new to the Stamp Review Crew, here is a little background. We are an international group of Stampin' Up! demonstrators that gets together on the first and third Mondays of every month to do a blog hop. Each hop features a single stamp set to give you loads of inspiration for that set! The hops are archived at the Stamp Review Crew blog, and you will be able to click through each hop at any time, going directly to the posts for that hop whenever you want! And you can click on the banner of this post to go to the master blog roll for this hop also.  

If you are following along in order, then you just arrived from Rochelle Blok's blog where she made very good use of this stamp set, I am very sure :)

I have to confess, I did not own this set until I got it with my last order from the Occasions Mini. There are just so many flower stamps sets, and I tend to gravitate to the not so flowery :) So this is the first project I have ever made with this set! I had an open house for the new catalog the first week of June, and when the order arrived I decided to make some fun tags with the customers' names on them to tie to the bags. Usually I just write the names on the outside of the bags, this is much classier :)
  • First I cut some 2" strips of Kraft cardstock and punched on end of each with the Scalloped Tag Topper punch. Then I used the Project Life Corner Rounder punch the round the two remaining corners. 
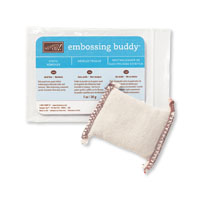
  • Then I used the Embossing Buddy to remove the static from each tag, and stamped a variety of flowers with Versamark ink. Then I sprinkled them with Copper embossing powder and heat embossed the flowers. 
  • Then I took a large piece of Vellum and stamped each name (one at a time) with the retired Skinny Mini Alphabet stamp set on the bottom edge with Versamark and embossed again with Copper embossing powder. Then I trimmed the name off the large piece of Vellum and went on to the next name until I had them all. 
  • Then I trimmed the ends of the Vellum strips to fit on the tags and stitched them on with my sewing machine, and added some White Bakers Twine to tie them to the bags. 
 I also made a coordinating Thank You card. This time I used the Copper embossing powder to do the flowers on the Vellum, and then used Thoughtful Banners to create the sentiment. The Duet Banner punch and the Pansy punch made quick work of these embellishments!

I added a Vellum Copper embossed flower inside. The Fine-tip Glue Pen worked like a charm to glue this in place.


I have seen so many great watercolor stripes lately, I had to do this fun tropical feeling card!
  • First I taped the watercolor panel down to an MDF board with painter's tape, then I used a fairly strong mix of Crushed Curry ink to paint on some stripes and used the heat tool to dry them. Then I came back with a more dilute mix of Crushed Curry with the Aquapainter and created stripes between the bolder stripes, and dried this again.
  • I splashed some water drops on the panel and dabbed them off, and dried it again.
  • Next I stamped the flowers with Versamark and embossed with White embossing powder. 
  • I used Watermelon Wonder and Tangerine Tango to color in the flowers. 
  • The Happy is cut from Gold Foil cardstock, and stapled to a 1½" wide strip of vellum and the watercolor panel.
  • I cut some palm fronds with the Botanical Builder framelits, added some adhesive with the Fine-tip glue pen, and tucked them behind the vellum strip. Then I adhered the panel to a Thick Whisper White card base.
  • I added some stamped off flowers inside in Watermelon Wonder and Crushed Curry. All done!
Quick and easy details to the inside add such a nice finishing touch I think :)

And how about a spinning flower with the new Shining Star framelits?! I could not wait to play with these!

I used the new thicker Foam Adhesive strips on this one. I love the depth they give, and how much space it gives the spinners :)


Ok, last project! This was a fun chain of flowers that I will probably hang on my paper cabinet. I have a chain of leaves hanging there right now, and they have been there for a couple years. Time to change it up a little, lol! I also used a bunch of the smaller pieces from the Botanical Builder thinlits, some Clear Wink of Stella, and Rhinestones and Pearl basic jewels to finish them off. AFTER I stitched them together of course :)

Here they are a little closer.

Phew! That is it for me, and now it is time to head on over to Dawn Tidd's blog to see what wonderful-ness she has created!

http://tiddbitsfromdawn.typepad.com/tiddbits-from-dawn/2016/06/the-stamp-review-crew-flower-shop-edition.html


http://rochelleblok.blogspot.com/2016/06/the-stamp-review-crew-flower-shop.html

If you have seen something you need for your crafting life, just click the image in the supply list below and it will take you to my store! If you order less than $150, please use this month's Host Code, which can be found at the top of the sidebar on the right.

And be sure to check the box allowing me to contact you when you check out. I can't send you a thank you card if I don't know your address! And I promise to only send you happy mail, no junk mail :)


Product List
Pansy Punch
[130698]
$16.00
Heat Tool
[129053]
$30.00

LinkWithin

Related Posts with Thumbnails