Sunday, May 31, 2015

Stamp Review Crew: Dotty Angles Edition

http://stampreviewcrew.blogspot.com/2015/06/stamp-review-crew-dotty-angles-edition.html
Woo-hoo! It's June!! Time for a new Annual Catalog in "one more sleep" as my kids used to say, lol! I remember so well last year when this set was a brand new set in the catalog and I just knew thi set had to be mine. I have not used it a much as I thought I would, or in the ways that I thought I would, but I have indeed used it enough :) Mostly the confetti dots though.

OK, before I get too involved here, a little about the Stamp Review Crew for those who are visiting us for the first time. We are a group of Stampin' Up! demonstrators, and we have a blog hop on the first and third Mondays of every month. Each hop features a single stamp set, and we show lots of great ways to use that one set :) We have a home here: Stamp Review Crew. If you get lost along the way, there is always a master blog roll list there, and the links are directly to the post regarding that hop, so you can hop easily through any of our past hops. GO check out the ones you have missed!

If you are hopping along in order, then you arrived from Nancy Smith's blog, fun stuff, right?!

OK, you may have noticed by now that I am a bit of a procrastinator. Things always get done in time for a deadline, but it might be riding the wire, lol! My youngest son (I will refrain from calling him my baby as he just looks away in embarrassment) graduated from high school on Saturday evening. We had family here for a quick supper, then off to the ceremony at 7:30pm. There were over 300 graduates from his class, so I say we were fortunate to be home by 10:30pm :) I then did some Stamp Review Crew business in prep for the catalog launch, then finally, at about 1:00am, started working on a project! This is the card I came up with. It took forever to get the creative juices flowing, and this card was being a stinker coming together.
 I embossed the triangles in white embossing powder over an entire panel of watercolor paper, then used an Aquapainter to wet areas before adding Watermelon Wonder first in the center, let that dry a little, then Delightful Dijon, then Mint Macaron, all with an Aquapainter and ink picked up from the lid of the inkpads. These colors watercolor beautifully! So many shades and the yellow and the mint are much brighter colors when diluted.
 At 2:45am, I thought, good enough! I am going to bed. I just laid my head on the pillow, and a great idea hit me!

This is not exactly what I pictured as I lay down, but it is very similar, and I will make the original vision when I have a little more time to play around.
This was done on watercolor paper, again. Love that stuff! I inked up the triangles stamp in roughly half Wisteria Wonder and half Wild Wasabi, misted it with about 5 pump from my Spritzer, then stamped repeatedly. I did not re-ink or re-mist more than once, there was plenty of ink and water. I love this look! I did ink up one end of the stamp with Wisteria Wonder and mist again for the far right side of the card as the stamp is not long enough for the whole card from in the landscape orientation.

I just used the Wisteria Wonder on the inside with the same method, but less misting.

OK, that is all I have for you this time! Off to go check out the talented Shana Gaff!

http://stressfreestamping.blogspot.com/2015/05/the-stamp-review-crew-dotty-angles.html
https://iguanastamp.wordpress.com/2015/05/31/stamp-review-crew-dotty-angles

Hello Watercolor card supplies:

Built for Free Using: My Stampin Blog

Watery Triangles card supplies:

Built for Free Using: My Stampin Blog

Challenges:

http://www.fridaymashup.com/2015/05/fm211-watercolor-fun.html

Friday, May 29, 2015

Stampin' Addicts New In-Color Hop: Mint Macaron

http://www.stampinaddicts.com/forums/general-stampin-talk/9571-2015-2017-color-blog-hop-starts-friday-may-29th.html

Who is ready for some fresh colors?! We are!! A bunch of us from Stampin' Addicts have gotten together to showcase the new In Colors that will be available to purchase on June 2, 2015.
I am stop #3 on this hop, and the only one to feature Mint Macaron. But I bet you see lots of this color in the other stops as well :) We have a thread for chatting and with the master blog roll list, go check it out!

If you are following along in order, then you just came from Holly Krautkremer's blog where she showed us Delightful Dijon. Love her mad skills with layering, right!

This card was inspired by LeeAnn Greff's how-to video for this fun gift card holding card! I love how classy these colors look together, and that lace is so luscious, soft, and flexible! You are going to be finding all kinds of ways to sneak more of this lace into your projects ;)

Inside you can see where the gift card goes. If I had not done the heat embossing on the white panel, I could have written a note, but sometimes we just want to add the recipient's name and sign the card, lol!

This project started with my thought that the Mint Macaron color is the perfect little berry basket color, and I could not move on until I had made a berry basket! Funny how creativity can be so demanding, right?! Then I started thinking about what I could put in the basket. I thought about doing some chalkboard type tags, then I remembered that I had seen that done by Teneale Williams, probably what made me want to do tags, lol! Then I thought about those lovely little picks from Handpicked framelits, but wait. From the Garden is going away with the Occasions Mini, and I can't get the sets that coordinate with the picks from the new catty until June 2nd. So I looked through my stamps, and guess what?! There are a BUNCH of sentiments that fit on these little picks!! I used just 3 sets here, but I had a stack of 7 sets with sentiments that fit in the picks, just on a quick look through my stash. Can't wait to start making more use of that discovery :) And i think these colors play quite nicely together also (as long as you don't let your watercoloring get too muddy like on the 2nd part of the birthday sentiment...) I used Calypso Coral and So Saffron with the Mint Macaron here.


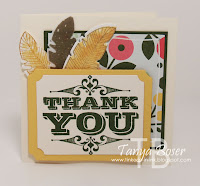
I think this card is my favorite, it has feathers, and ombre, and burlap, and Crumb Cake. Blues and greens too! Talk about a pile of my favorite things, lol! There are 2 color combos in the feathers here. On the left side of the card, it is Mint Macaron, Wild Wasabi, and Garden Green. On the right side of the card, it is Mint Macaron, Pool Party, and Lost Lagoon. I love the look of both combos, and they both look great on the card together! I had not played with this stamp set yet, and I needed to use it while it is still available. It is not retiring yet, but it was one of the monthly photopolymer releases this winter and is only guaranteed in stock for 6 months from the release date.

 I added a couple of those fun multicolored feathers on the inside too. To make the feathers multicolored, I started by inking up the stamp with the lightest color, then only partially inked with the midtone color, then inked just the base of the feather with the darkest color. Then I stamped it! And cleaned the stamp between each impression.

To see the supplies I used for these projects, scroll to the bottom of this post.
Now it's time to go check out the marvelous Heidi Bak's blog and her creations with Tip Top Taupe!
\
http://runningwscissorsstamper.blogspot.com/

http://rubberredneck.typepad.com/


Graduation Gift Card:

Built for Free Using: My Stampin Blog

Berry Basket and Sentiments:

Built for Free Using: My Stampin Blog

Happy Feathers:

Built for Free Using: My Stampin Blog

Challenge Sketch for Happy Feathers:
http://mojomonday.blogspot.com/2015/05/mojo-monday-399.html

Tuesday, May 26, 2015

Weekly Deals May 26th

Check out what is on special this week! Gotta love a good deal :)

And a reminder that this is the last day that the retiring stamp sets are guaranteed to be in stock, so get those orders in quick!

Click here for the Retiring list.

May 26-June 1, 2015
Weekly Deal

Saturday, May 23, 2015

Operation Write Home: Finishing Strong Blog Hop

http://wp.me/p2kUr6-5bB

Operation Write Home, a charity that has supported heroes with handmade cards since 2007, will be closing later this year. All cards need to be sent in by August 1st, so I’m helping to get the word out!

I have supported this cause for several years and still believe it is a good thing. I am so happy we are able to stop sending cards to our troops as so many more of them are home with their families again! Hopefully, we are all thinking or those who have served our country in the Armed Forces this weekend. I know I am. My father is a Vietnam vet, and he really doesn't talk about it much. Neither does his brother, who served at the same time.  I think I will give them each an extra hug this weekend :)


 I could not resist doing some more watercoloring inside the debossed areas created by my embossing folder on a piece of watercolor paper. Such a fun technique that I have not seen anyone else do yet! I hope you give it a try. Lots of texture without the bulk and lumpy-bumpiness.


 Inside just gets a little bit of stamping on the edge of the card liner in Real Red.

I used the OWH challenge sketch #44 for this card.

http://operationwritehome.org/ss-sketch-challenge-44/


If you would like to see the recipe for this card, click here. And be sure to click on the banner at the top to continue on this fantastic hop to "Finish Strong"!

Patriotic Southwest Birthday

As they want to keep the blog posts short for the Operation Write Home:Finishing Strong Blog Hop, we were encouraged to share our instructions and recipes on another post the same day and link to it for those that are interested. So here is mine!


  1. Cut a 3"x4¼" panel of watercolor paper. Emboss with embossing folder. 
  2. Use an Aqua-painter and Pacific Point and Real Red ink (squeezed onto the lid of those inkpads) to add color to the debossed, or "down" parts of the embossed image.  Allow to dry.
  3. Cut a piece of vellum to 3¼"x4½" and adhere the watercolor panel to this.
  4. Cut a 1"x3" piece of vellum and stamp sentiment in Pacific Point ink, then sprinkle on Clear embossing powder, tap off the excess and heat with heat tool. Cut a banner end with 1" Square punch, Hexagon punch, Triple Banner punch, or your scissors-whatever you preferred method is. Run a line of stitching on the left end of the banner with sewing machine. You are not sewing it to anything else here, just adding the fun stitching detail. Apply adhesive just under the stitching and stick to the watercolor panel.
  5. Cut a piece of Real Red cardstock to 2¼"x5½". Stamp the top and bottom with the triangle design from Dotty Angles set in Real Red ink. Outline piece with Signo white gel pen.
  6. Take a 4"x5¼" piece of white cardstock to use as a card liner and stamp the triangle image again in Real Red on the right hand edge. 
  7. Take a Pacific Point cardbase and outline the front with a white gel pen. 
  8. Adhere the Real Red strip to the center of the cardfront. Then apply dimensionals to the back of the watercolor and vellum panel, adhere to the center of the card. 

Built for Free Using: My Stampin Blog

Thursday, May 21, 2015

May 2015 Paper Pumpkin: Birthday Bundle


Here is the next Paper Pumpkin, complete with an unveil and how to! I can't wait to play with mine :) And there is a special going on right now through June 10, 2015..... 50% off your first two months of Paper Pumpkin for new subscribers!

https://mypaperpumpkin.com?demoid=2010774

Use Promo Code SAVE50 to get this special deal.

Sunday, May 17, 2015

Stamp Review Crew: Four Feathers Edition

http://stampreviewcrew.blogspot.com/2015/05/stamp-review-crew-four-feathers-edition.html

This edition of the Stamp Review Crew is featuring a stamp set I have gotten my money's worth from, and about 10 other people's money's worth, lol! I adore this set and will definitely be keeping in it my stash to pull out and use over and over again. It came out this past fall in the Holiday Mini, and it was on my first order along with the coordinating dies. It is now on the Retiring List and will not be available when the new catalog goes live, so this is kind of a last hurrah for this set. Sniff, sniff...

OK, let's get the usual informational blurb out of the way! I hope there are a bunch of people that need it, more new people is a good thing :)

If this is your first time on this hop, the Stamp Review Crew is a group of Stampin' Up! demonstrators, that feature a single stamp set on the first and third Mondays of every month. Our mission is to show you many creative uses for each set that we feature. Check out the master blog roll for this, and all of our past, blog hops here! Every hop is permanently linked to the actual post you are looking for for that hop, so the fun continues always!

If you are following along in order, then you just arrived from Deb Currier's blog. She always comes up with something stunningly clean and simple!

This first card is very simple, and I would like to think clean :) This is not my usual style, and I don't do it very well. But I keep trying! I like that this is super flat and will not require extra postage and yet is bright and cheery. It works for a man or a woman also. I think this is pretty self explanatory so I am not adding instructions.

I resisted the urge to add white gel pen. I can't promise that it won't end up on here before it is mailed to someone though, ;)

This is more like my usual style, and has some watercoloring on it. I started out just wanting a textured and embossed panel for this card and embossed a piece of watercolor paper. Then I noticed that the embossing created fun little debossed areas that I could add color too! So, I used an Aquapainter and added color to a few of the debossed areas. LOVE it! The rest just sort of evolved along the way. :)


I mimicked the feather placement from the card front inside also. I might have to add white gel pen here too. It is a compulsion, I tell you!

Here are several projects from my archive that use this set also, click on photos of archived projects below to go to the specific post for each. Supplies and instructions will be found there:

http://tinkerin-in-ink.blogspot.com/2014/08/stampin-addicts-2014-fall-holiday-blog.html


http://tinkerin-in-ink.blogspot.com/2014/08/stampin-addicts-2014-fall-holiday-blog.html

http://tinkerin-in-ink.blogspot.com/2014/08/stampin-addicts-2014-fall-holiday-blog.html

 
http://tinkerin-in-ink.blogspot.com/2014/09/little-thanks.html

http://tinkerin-in-ink.blogspot.com/2014/09/feathered-feathers-watercolor.html

http://tinkerin-in-ink.blogspot.com/2014/09/watered-feathers.html

http://tinkerin-in-ink.blogspot.com/2015/02/watered-feathers.html


Alrighty then, it's time to head on over to Heidi Baks' blog. Be prepared for greatness! Heidi has a fantastic eye and is quite the engineering crafter!

http://runningwscissorsstamper.blogspot.com/2015/05/the-stamp-review-crew-four-feathers.html

http://artfeltimpressions.blogspot.com/2015/05/the-stamp-review-crew-four-feathers.html

Supplies Clean and Simply Feathers Card:

Built for Free Using: My Stampin Blog


Supplies for Arrows Watercolor Card:

Built for Free Using: My Stampin Blog


Click on photos of archived projects above to go to the specific post for each. Supplies and instructions will be found there.

LinkWithin

Related Posts with Thumbnails