This card is full of vibrant color and is all shimmery from the Pearlized Water I used to wet the watercolor paper. It came together very quickly, and I am feeling the urge to make it again, lol! Here is how I made this card:
- Cut a piece of watercolor paper to 4"x5¼". Take the Happy Heart embossing folder, open it up. Now, there are a few ways to apply the ink to the embossing folder. I happen to have all of the ink colors in the ink spot sizes, so I used those to rub the ink onto the folder. You can also use markers, sponges, or daubers to apply the ink. Just apply strips of color over the side with the Sizzixx insignia on it. Then spritz the watercolor with about 3-5 pumps with the spritzer filled with either plain water or Pearlized Water. Lay the wet watercolor paper wet side down onto the inked part of the embossing folder, close the folder, then run it through your die cutting machine. Allow to air dry, or speed it up with your heat tool. Stitch around the edges with a sewing machine. Apply foam tape or a bunch of dimensionals to the back and adhere to a Thick Whisper White card front.
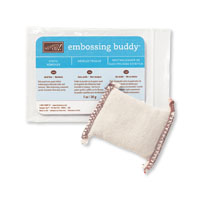
- Punch a heart out of thick Whisper White card stock. Take a scrap of vellum at least 2½" square, wipe with an embossing buddy, and stamp with the sentiment in Versamark. Sprinkle with Gold embossing powder, heat with heat tool until the embossing powder has all melted and turned shiny. Use the heart framelit from the Mini Treat Bag dies to cut the sentiment out. Lay over the white heart you punched earlier and stitch a line just under the first line of the sentiment to hold the hearts together. Apply dimensionals to the back of the white heart.
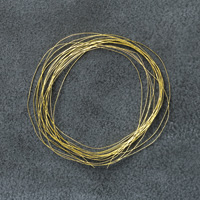
- Unwind several inches of the Gold thread and wrap it around 3-4 of your fingers to create a tangle. Peel the backing of the dimensionals on the heart and stick the thread to them, arranging as desired. Stick this all to the card front.
- On the inside of the card, stamp the big outlined word "Rainbow", then color in with an Aqua-painter or a blender pen with all of the colors used on the front panel.
- All done!
The cardstock did warp a little bit from the use of the Aqua-painter, so if that would bother you, then I would use a blender pen.
Now, are you going to try this one yourself? I want to see!! Post a link to yours in the comments pretty please :)
And if you would like to purchase some of the items I used today, here are some convenient links to help you out :) If your order is less than $150, please use this month's Host Code: PCUN2KHD
Product List


1 comment:
This is a beautiful card. I love all the bright colors, the vellum heart, the gold embossing and the colored sentiment on the inside. Thanks so much for all your tips about how you created it. Love it.
Post a Comment