You might recognize that background piece. I made it while filming a video on how to create a Northern Lights background. It has been lurking around my craft room waiting to be added to a project of some kind. It still evokes a night sky in this setting, but hopefully more of a road trip feel to it. And what about that little dog?! Isn't he the cutest thing ever?! There are several adorable accessories in the Beautiful Ride set, and since it is a photopolymer set, it is easy to put them just where you want them :)
Here is how I made this card:
- Create top folding Thick Whisper White cardbase with a 4¼"x11" scored at 5½".
- Cut a 4"x5¼" panel of Smoky Slate, emboss with the Lucky Stars embossing folder. Adhere centered on the card front.
- Using your favorite black ink, stamp the "good company" sentiment inside the card, then the hearts centered below it. And then add the "xoxo" stamp to each side of the hearts. Use Aqua-painter to add some light Blackberry Bliss to the hearts.
- Stamp the VW bug in a waterproof ink on Thick White cardstock, then add the dog in the window. Apply color (SU Pool Party, Blackberry Bliss, and Tim Holtz Distress Black Soot) with an Aqua-painter. Use a light hand with the water though, removing excess from the brush as needed.
- Fussy cut the VW bug. Or, if you were lucky enough to get the Dies by Dave VW Coupe die, use that! I say lucky because he sells out frequently and his shop is closed about 1/3 of the time while he works his real job :)
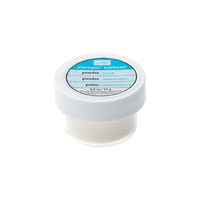
- Cut a piece of vellum to 1½"x4", stamp the sentiment in a black ink near the bottom center of the vellum strip. Then sprinkle with Clear embossing powder and heat with heat tool until embossing powder is melted.
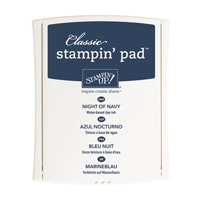
- Create the 3¼"x4½" watercolored panel by first spongin on Blackberry Bliss and Night of Navy ink, then sptrizing with water to blend the colors. Dry, then splatter panel with water, allow the water to sit for a few seconds, then lay a cloth or a paper towel over the panel to pick up the water adn some of the ink. Repeat if needed to get the desired effect. Dry again.
- Outline watercolored panel with a Signo white gel pen.
- Apply dimensionals or foam tape to the back of the watercolored panel and adhere to card front.
- Figure out where the car will cover part of the vellum, apply Tear & Tape to the back of the strip there and adhere to the card front. Use liquid glue or more Tear & Tape to adhere the car.
- Use Fine-Tip glue pen to add some dots of glue, then apply a few irridescent and a purple sequin to the card front. Or you could skip these if you don't want any frou-frou on the card :)
I tried to keep the dimension reasonable for mailing as I am not sure who I will be giving this too. Otherwise I may have used dimensionals on the car too.
And here is that video with how I created that background. Hopefully it helps someone out there :)
I suppose you want to see the inside of the card :) Here it is. I love how this turned out!!
What do you think? Have I convinced you to do some watercolor of your own yet? I would love to see what you make if you do!!
And if you would like to purchase some of the items I used today, here are some convenient links to help you out :) And if your order is less than $150, please use this month's Host Code: PCUN2KHD
Product List


2 comments:
yOu are one talented lady! Especially cool watercolor background technique. :o)
There are a few interesting points in time in this post but I don’t know if I see they all center to heart. There is some validity but I most certainly will take hold opinion until I consider it further. Great article , thanks and we want far more! Put into FeedBurner likewise Happy Promise Day
Post a Comment